Posts

Showing posts with the label card

You're Tops In My Book
Image
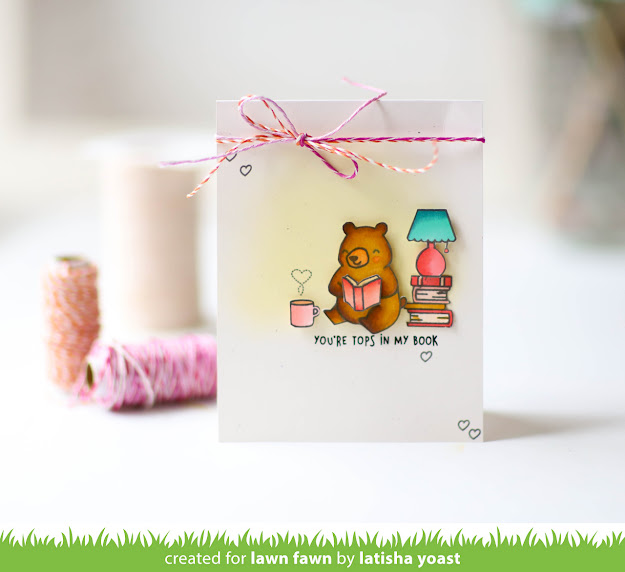
  Hello friends! I have another new Lawn Fawn card to share with you today! It is from the newest stamp set called Den Sweet Den. It has the cutest little homey stamps that a bear would love. For this card I chose the stack of books, lamp, open book, coffee mug and bear images to create a clean and simple scene. I blended some light yellow ink onto the white card base, stamped the sentiment in black and then added stamped hearts. The images were stamped, colored in with copic markers and then fussy cut out. The images were then adored to the card front with foam adhesive. To embellish a double bow using twine was added. Make sure you are visiting the Lawn Fawn Blog everyday to see the beauful projects shown!

Extra Bonus Day!

Image
Surprise! There is a bonus day for the Lawn Fawn Inspiration Week. Today is the very last day, yesterday was the release and we just had to share a few more projects. This cake slice die, is so freaking adorable. And I have to say, would make such great packaging for party favors and gifts. The die set comes with everything to complete the cake slice. Top, bottom, embellishments and details. Its a great stand alone die for sure! There is also another die set called Just Stitching Double Rectangles. This creates a double stitched rectangle on the project of choice. Head on over to the Lawn Fawn Blog to check out todays projects!

Sending Hugs

Image
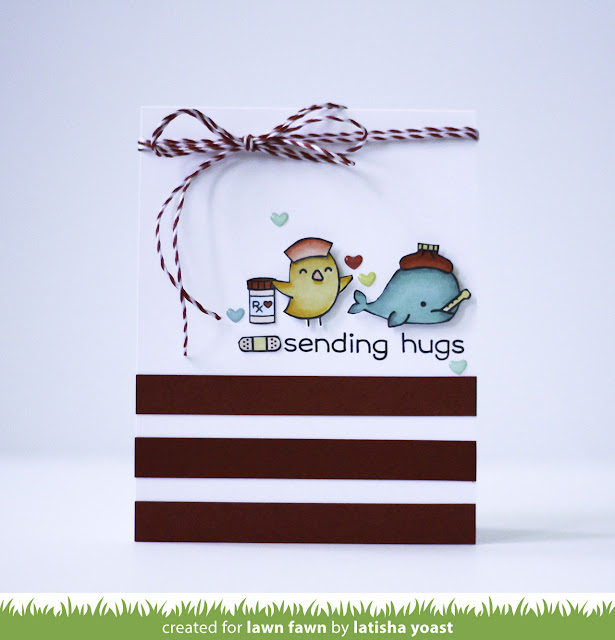
Hello friends! Long time no see! I am so sorry that my blog has been silent the last few months. My husband has had quite a few medical issues arise, including brain surgery that was not planned.  In January we learned he had something called a cavernous malformation, which he had surgery for and removed. His medical team at The Mayo Clinic (Jacksonville) has been nothing short of incredible.  A big thank you to everyone who reached out, sent positive vibes and prayers. We felt all of them! Which brings me to my card today. How fitting that its a Get Well stamp set, love it! Today I am sharing a card using the Get Well Soon Before & Afters from Lawn Fawn . I started by stamping the images with black ink onto white cardstock, then coloring them in using Copic markers. At first, the bottom of the card was going to be a solid piece of red cardstock, but it looked really plain and was missing something. So I trimmed a few pieces at .5 in x 4.25 inches, and adhered ...

Cream To My Coffee

Image
Friends. Like many of you, I love coffee. It is my most desired beverage of choice in the mornings, its just kind of magic. For those of you who do not drink coffee, never fear, there are cocoa and marshmallow sentiments included, you are not forgotten. Just looking at this stamp set, and knowing all of the different ways I can decorate these mugs, makes me insanely happy. This is the Thanks A Latte stamp se t from Lawn Fawn, and I love it. I started by ink blending aqua ink onto the cardbase, then stamping the sentiment in black ink, and the bottom of the card. The images were stamped onto white cardstock, then colored in using Copic Markers. The latte art was created by coloring in the coffee mug with a copic marker then stamping over it with a brown ink.  All of the images were hand cut, and then applied to the card using foam adhesive. To finish the card, red hearts were stamped at a diagonal, and a red satin bow was added.  It is time to bring bows back frie...

Have YoursELF a Merry Little Christmas

Image
  Hello friends! The September Lawn Fawn Inspiration Week starts today, and today the focus is on the stamp set called Holiday Helpers . In true Lawn Fawn style it is so super cute.   For this card, the front panel was die cut using the new portrait Snowfall Backdrop . Then using dark blue, aqua and green inks and and ink blender, ink was applied to the panel.  I imaging the North Pole has a sky that is super magical, so this is what the sky looks like there in my imagination lol.  The sentiment was stamped at the bottom of the panel in black ink. The panel was adhered to a card using foam adhesive. The images were stamped onto white cardstock with black ink, and then watercolored in. Once the images were dry the images were adhered to the card using foam adhesive. For more great projects and holiday inspiration head on over to the Lawn Fawn Blog !

Happy Fall

Image
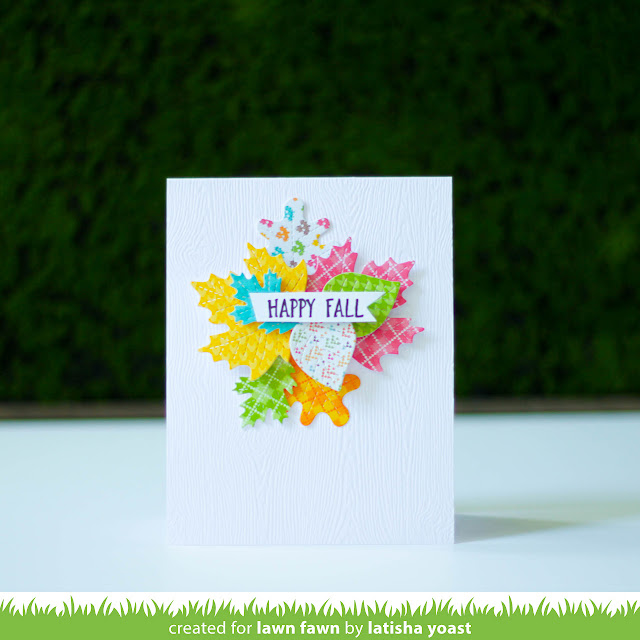
Am I the only one who gets excited over a new pattern paper collection? Especially holiday papers! It is very much still summer, and I am not wishing this warm weather away at all. However, winter holidays (not the cold) are my favorite!   Lawn Fawn created a new pattern paper collection called Knit Picky Fall.  Its a play on the original winter collection. To create this card, I started by making a card base with the new white woodgrain cardstock. This is a top fold card base and measures 4.25 x 5.5 inches. The pattern paper was die cut using the Stitched Leaves die cut set .  Once I had the pattern paper die cut out. The diecuts were adhered to the card using foam adhesive.  To create a cool dimension, the leaves were popped up at different heights.  The sentiment was stamped in black ink, trimmed and adhered to the card front. For more great inspiration using this paper, head on over to the Lawn Fawn Blog .

Hello Love Bug

Image
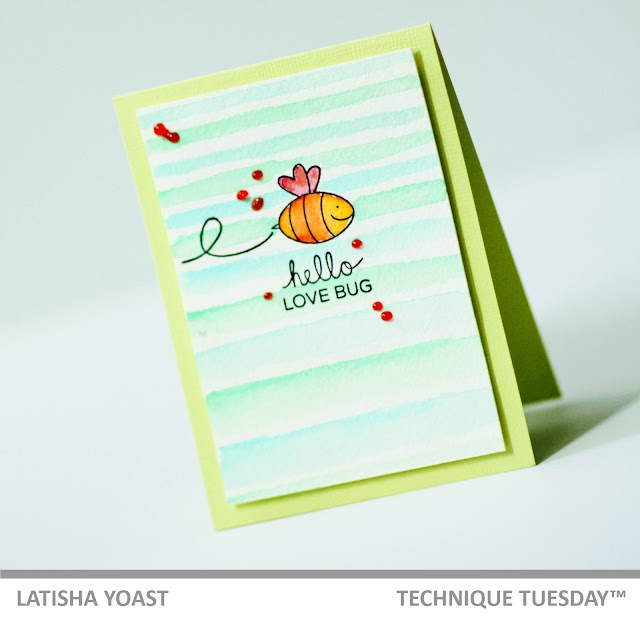
Hello friends! Our friends over at T echnique Tuesday , are releasing a few new stamp and dies sets for July.  Today I am sharing a card using the Bugs & Kisses stamp set.  I gravitated towards the bumblebee image, so I created a simple watercolored background and watercolored in the bumblebee as well.   To see the full stamp set reveal, head on over to the Technique Tuesday Blog to check it out, as well as the other stamp/dies being showcased today. 

Enjoy The Little Things

Image
Enjoy the little things. Isn't that the truth! I absolutely love this sentiment. Today the Lawn Fawn Design Team is showcasing the stamp and coordinating die set called Village Shops. I knew I wanted to do some kind of watercolor scene, with just the stamps. One of my personal goals this year was to learn something new, when is comes to coloring mediums. I have been coloring with Copics for over 15 years, and it is 100% my wheelhouse. Watercoloring is scary because its really hard to control water lol. But I am slowly learning this craft. If you are experimenting with something new, my advice is to be patient with yourself, and not to compare your work. Anyhow, back to the card. I stamped the images with versafine black ink, once its dry, it is completely waterproof and perfect to watercolor on. I chose the cute little ice cream truck, the clouds, a potted plant and the music notes. To color the scene I chose Daniel Smith and Prima watercolors. Its a very simple card, but...

You're the Sweetest

Image
Hello friends! It is summer!! Yay!! Summer and Christmas are my favorite seasons. I know Christmas is not a season, but winter is so hard on my body, the only way I enjoy it is to fully embrace the holiday seaons. Anyhow, back to summer! Do any of you have any fun summer travel plans? Because of my husbands job, we have lived away from family (california) for almost 20 years. Typing that number out, made me realize how long I have been away. Most of those 19 years we have lived in the south east of the US. As much as I miss California, the south suits me, and most likely what my children consider home.  When your children get older, its very hard to coordinate their schedules, along with my husbands.  But miraculously we all will get to go to California together, it has been a long time since that has happened. Usually it is just the kids and myself.  I am in need of relaxing, down time to just chill, especially since we have a busy year ahead of us. I plan on wine ...

Be a Pineapple

Image
  Hello friends! If you are sensing a theme, you might be right lol!  I am sharing another fruity card using the stamp set Funny Fruits from Technique Tuesday .  It is one of the stamp sets in the June release.  The full stamp reveal is over on the Technique Tuesday blog . I almost made this card using the peach, it was a hard decision, but the pineapple prevailed!   The pineapples were stamped in black ink repeatedly, then colored in with alcohol markers.  The sentiment didn't quite look right stamped onto the white cardstock above the pineapples. Instead it was stamped onto the same yellow paper, as the card base.  It is day 43289 of rain. Ok thats a lie, but it has been raining here in FL for about 3-4 weeks now, which is a recipe for being lazy. The gloomy sky is an energy suck. Hopefully today, the sun decides to show his face. I don't think its going to happen, but one can always hope!

Manatee-rific

Image
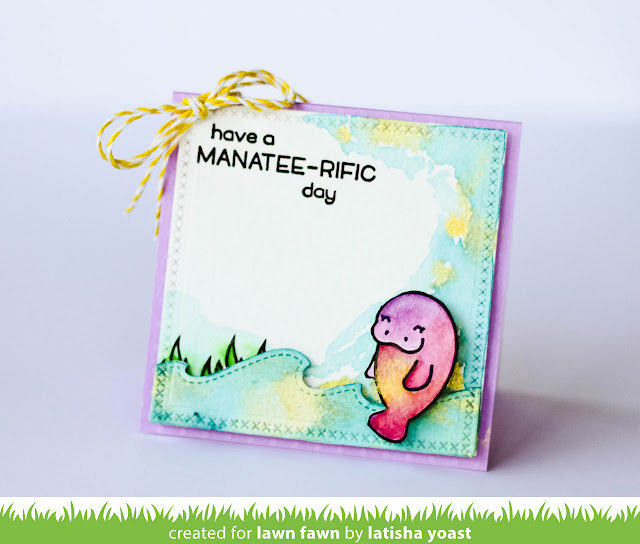
When I started working on this card, I mostly was playing around with watercolors, trying to find a muted ocean color.  I live close to the ocean, and sometimes when the sun hits the water just right, you see gold.  Thats why there is gold in the blue.  To be honest, I know I have see manatees, but don't remember what color they were. So, i made a pretty ombre of pink and purples. Just a card with a pretty wave and colors for you today.  Its fun to be free in cardmaking at times instead of overthinking a design. Head on over to the Lawn Fawn blog, where there are seriously amazing samples, they are crazy good!

Let's Roll

Image
Hello friends! The next few days, I will be sharing projects from the Lawn Fawn summer release.  I am warning you now, you will want it all.  They are just so cute! The card above has a few new products on it.  A stamp set called Coaster Critters, and a die set called Bunting Borders.  If i see a banner stamp set, stickers or dies, I instantly need them.  Anyone else? They just add a nice festive touch to basically everything. So, I die cut water color paper with the Bunting die, then water colored each banner.  The roller coaster was stamped onto the front panel in permanent black ink, then the grass and sky were water colored.  The cart, critters and ticket booth were stamped onto water color paper, colored in, fussy cut out, then adhered with foam tape onto the card front.  The design team has made such great samples using this set, I encourage you to go check them out over on the Lawn Fawn blog.  There also is a huge giveaway! ...

Love Beyond Measure

Image
  Hello friends!  I hope wherever you are visiting from today, that you are having a wonderful Sunday!  I am showing a sneak peek of a new stamp set called What A Guy from Technique Tuesday.  This set has really fun "tool" images and then sentiments that coordinate with the tool. Its very clever.   I was in a watercoloring mood before starting on this card. So for selfish reasons more than design reasons, I stamped the tape measure images multiple times, using VersaFine black ink.  This is a permanent black ink, that works perfect when watercoloring.  A grey/blue, deep blue and yellow/orange were the water color pigments that I chose to use.  This is a masculine card, so the colors help convey that theme. Head on over to the Technique Tuesday blog , to see the full reveal of this set! Materials Used: Technique Tuesday What a Guy stamp set grey card stock Bristol smooth water color paper Daniel Smith watercolors ...

Floral Thanks

Image
Hello friends! Another floral watercolored card today.  I am really loving the experimentation with different forms of watercolor. Whether its, traditional watercolors, or ink pads or pens, water based techniques are a lot of fun! I started by stamping the flowers in a pigmented black ink, once the ink was dry, I watered in the flowers and leaves.  Once the images were completely dry, they were cut out with scissors and set aside. The sentiment was stamped onto water color paper, as well as a few additional flowers.  The flowers were watercolored with Zig pens, and a brush.  The cut out flowers and leaves were adhered to the card using foam tape. This is a brand new stamp set from Technique Tuesdays April release .  Its called, Flowers For Her.  The full reveal is on the TT blog .

Life Happens, Coffee Helps

Image
Hello Friends, are you ready for another sneak? Today I created a card using a stamp set called Sassy Girl thoughts, it has really great sentiments with images to coordinate. For this card I stamped the sentiment first in black ink, then randomly but not randomly stamped the coffee mug over the card front.  The coffee cups were colored in using Copic markers! Head on over to the Technique Tuesday blog for a full reveal!!

Happy Birthday

Image
Hello friends! Today is a card from the Beam Me Up stamp set from Lawn Fawn.  It has cute little aliens and space crafts, and the sentiments are so punny. When I started this card, I had no idea how long I would be blending that ink lol.  I blended for over an hour, and I thought I was crazy.  But, I love how it turned out and have #noregrets. The stars and sentiment were stamped in white ink, then heat embossed in white embossing powder. For more fun and inspiration, head on over to the Lawn Fawn blog .

Hay There

Image
Firstly, that I I stamped the little pig in black ink, created a mask for it, and then stamped the cow and horse images.  Making the pig, helped create this fun scene, and adds dimension on a flat card. Next, I watercolored the images using Zig watercolors makers and an aqua brush.  The main panel was diecut using a rectangle die, and adhered to a watercolor paper card base.  To embellish, the twine bow was added in the corner. For more great project using this set, head on over to the Lawn Fawn blog .

Aloha

Image
Ever since I received this stamp set I have been smitten.  There is nothing about pineapples with smiling faces, that i don't love.  Its just "so cute".   I decided to create a custom stamped background using the pineapples and then colored them in using copic markers. The "aloha" sentiment was cut out using a die and foam adhesive sheets. Make sure you head on over to the Lawn Fawn Blog , to see all of the great projects using this set. Also for a chance to win.  No worries if you don't win, because this stamp set is just a few dollars and so very affordable! Love that!!

Bun In The Oven

Image
Hi Friends! Just a clean and simple card today, with a technique.  I used 3 different inks and a mini blending tool, to create the background. The trick is to use the ink lightly and to keep building it up until you like the color.  This does take a little bit of time to create a seamless blend, but its worth it.  I stamped the sentiment in black ink, as well as the images.  I colored the images in with copic markers, cut them out and then adhered them to the card using foam adhesive.  To embellish, I added some twine in the corner. Head on over to the Lawn Fawn Blog , to look at more great projects as well as a chance to win this stamp set!

I Love You Sew Much

Image
Hello Friends! Welcome to the April Inspiration Week for Lawn Fawn.  The designers are using the Stamp and Die set Sewn With Love today.  Its a set with sewing element images and perfect "pun" sentiments.  Head on over to the Lawn Fawn Blog to check out all of the projects created as well have a chance to win this set. I started by blending Merman ink onto the card front with a mini blending tool, once the ink was blended and dried, I stamped my sentiment.  The images were stamped onto white cardstock, colored in with copic markers and then cut out with coordinating dies.  I adhered the diecuts to the card using Scrapbook Adhesives by 3L 3D Foam squares, and added the twine bow using an adhesive dot.  To ground the card a little bit, I adhered a strip of yellow cardstock, to the bottom of the card.