Posts

Showing posts from September, 2018

Thankful

Image
Hello! Technique Tuesday is about to release a stamp set called Luscious Grapes . Its a smaller stamp set that includes a pretty grape image, and then a few bold sentiments.  Today, I am using that set.  First i started by stamping the grapes with a permanent black ink onto watercolor paper. Using watercolor, the image was colored in. I try and let each color family dry before moving on to the next so the colors don't muddle. The thankful sentiment was also stamped in black ink. The panel was diecut with a square die, and then adhered to the card front using foam adhesive. This is such a fun fall image or perfect for anyone who loves wine! Head on over to the Technique Tuesday blog to see the full reveal of this set!

Tangle Free Holiday

Image
Hello Friends! The process of making this card, was extensive, only because I messed up a few times and had to start over.  FYI don't ever put clear glaze on part of a card and then let it stand up, the glaze will drip down the front of your card lol. I started by stamping the String Lights image onto white cardstock, then coloring in the bulbs using red and green copic markers, then coloring around the lights in a blue green. Clear wink of stella was used to put a little bit of shimmer over the lights, and then Nuvo clear glaze was placed on top.  It gives each bulb, a shimmery glaze and a lot of dimmension which is pretty neat for a one stamp card. The front panel was adhered to the red card base using foam adhesive, and Nuvo drops were applied under the string lights for an embellishment. For a full image of this stamp set head on over to the Technique Tuesday blog !

Magical Christmas

Image
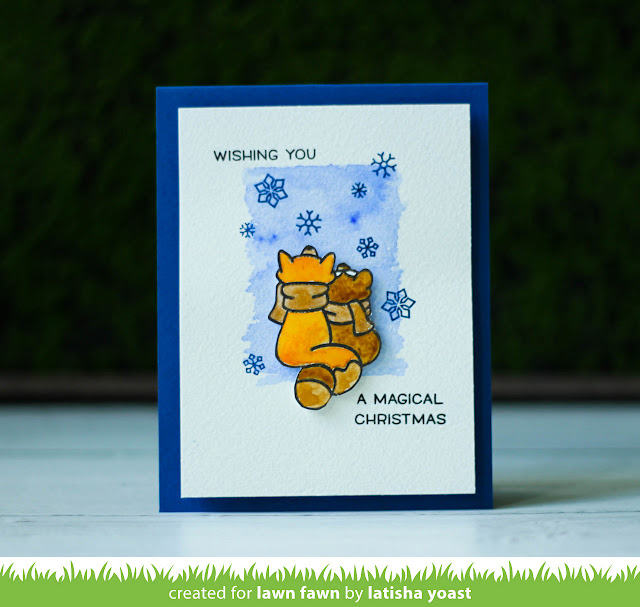
Watercoloring can be very intimidating, even for me. But the more I watercolor using good brushes, and watercolor pans, and a watercolor I like, the more it becomes muscle memory.  Using the same materials each time, dramatically helps with consistent results (for me). I began this card by creating a rectangle water wash onto the watercolor. Then dipping into a blue ink, creating a blue background, which is considered a wet on wet technique.  Once dry the snowflakes were stamped on top in a navy ink, and the sentiments were stamped in black ink. Using the same watercolor paper, the foxes from the Winter Skies Stamp set were stamped in black ink onto a separate piece of paper, and then water colored in using, sepia, brown and orange tones.  You cannot tell in the photo but a shimmer watercolor was added to the scarves to make them sparkle. Once dry the foxes were cut out and adhered to the panel using foam adhesive.  The panel was then adhered to navy blue card stock. For

Merry Christmas

Image
The paper collection from Lawn Fawn called Really Rainbow Christmas is so bright, happy and will certainly bring cheer!  Cards that have a lot of white space, and pops of color, are so attractive. So that is what I had in mind when I was designing this card.  The red frame was created by die cutting a piece of red pattern paper, then adhering it to the card using foam adhesive. The banners were created by using the Bunting Borders die set, and petite Really Rainbow papers, some were adhered with foam adhesive and some with just tape runner, to help give the card dimension. The tree was created using the Outside In Stitched Christmas Trees and Stitched Christmas Tree Frames die sets. They layer perfectly and were adhered together using foam adhesive.  The sentiment from Simply Winter Sentiment was stamped using black ink, trimmed to size with scissors and then adhered to the card. To embellish aqua Nuvo drops. Head on over to the Lawn Fawn Blog to see more wonderful pr

Cream To My Coffee

Image
Friends. Like many of you, I love coffee. It is my most desired beverage of choice in the mornings, its just kind of magic. For those of you who do not drink coffee, never fear, there are cocoa and marshmallow sentiments included, you are not forgotten. Just looking at this stamp set, and knowing all of the different ways I can decorate these mugs, makes me insanely happy. This is the Thanks A Latte stamp se t from Lawn Fawn, and I love it. I started by ink blending aqua ink onto the cardbase, then stamping the sentiment in black ink, and the bottom of the card. The images were stamped onto white cardstock, then colored in using Copic Markers. The latte art was created by coloring in the coffee mug with a copic marker then stamping over it with a brown ink.  All of the images were hand cut, and then applied to the card using foam adhesive. To finish the card, red hearts were stamped at a diagonal, and a red satin bow was added.  It is time to bring bows back friends.

Watercolored Seasons Greetings

Image
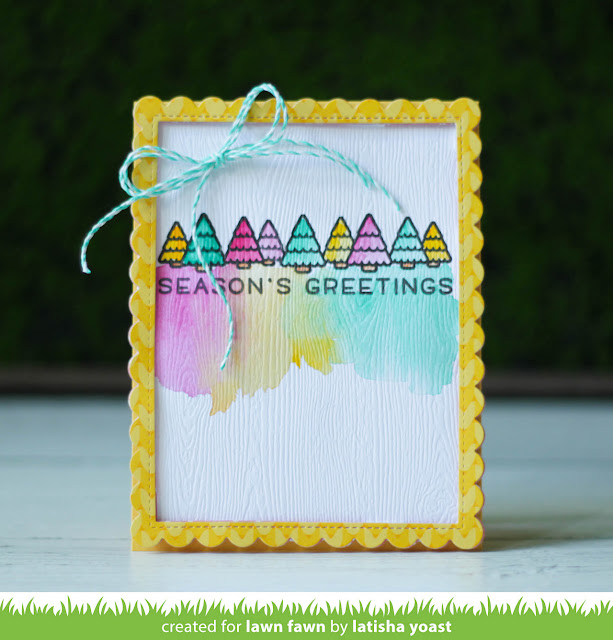
Hello Friends. The September Inspiration Week from Lawn Fawn continues! Today my card is using the stamp set called Simply Celebrate Winter . The images from Simply Celebrate Winter, are close to 4 inches wide, which makes them perfect to stamp on a card front, as well as the "season's greetings" sentiment. I started by stamping the image and sentiment with black pigmented ink, onto the white woodgrain cardstock. Once the ink was dry, I started to watercolor the trees.  I then did a wash of each of the colors down below the sentiment. Since the color was wet, as well as the cardstock, a wet on wet effect came into play. That is how each of the colors slightly blend into each other. For more great projects and inspiration, as well as a chance to win this stamp set. Head on over to the Lawn Fawn Blog . 

Technique Tuesday Christmas Blog Hop

Image
Welcome to the Technique Tuesday Christmas Blog Hop.  Today I create a card using the Vintage Christmas stamp set. It has great vintage images and sentiments to help you create beautiful holiday cards. The Christmas tree was stamped in clear ink, then heat embossed with clear embossing powder onto water color paper. The tree was colored in with green and red water color pigments, and then left to dry. Next the Santa, bag and gifts were stamped in a black pigment ink, covered in clear embossing powder, then heat set.  The images were colored in using water colors, left to dry then cut out with scissor.  The sentiment was stamped in black ink, then the images were adhered using foam adhesive. to embellish satin ribbon was added then the panel was adhered to a green card. Next up on the hop is Teri . here is the complete blog hop list Daniela Amy Heather Emily Kymona Dana Jill Latisha Teri   Technique Tuesday blog

Have YoursELF a Merry Little Christmas

Image
  Hello friends! The September Lawn Fawn Inspiration Week starts today, and today the focus is on the stamp set called Holiday Helpers . In true Lawn Fawn style it is so super cute.   For this card, the front panel was die cut using the new portrait Snowfall Backdrop . Then using dark blue, aqua and green inks and and ink blender, ink was applied to the panel.  I imaging the North Pole has a sky that is super magical, so this is what the sky looks like there in my imagination lol.  The sentiment was stamped at the bottom of the panel in black ink. The panel was adhered to a card using foam adhesive. The images were stamped onto white cardstock with black ink, and then watercolored in. Once the images were dry the images were adhered to the card using foam adhesive. For more great projects and holiday inspiration head on over to the Lawn Fawn Blog !

I'd Cross an Ocean For You

Image
Hello Friends!! Today I am sharing a card using a stamp set called Wendell the Whale from Technique Tuesday. I watercolored the background as well as the whale image using Daniel Smith and Sennelier water colors. To add a little bit more interest to the whale, white dots were added using a white gel pen. The full reveal of this stamp set is over on the Technique Tuesday blog !