Posts

Showing posts from August, 2009

Follow your own Star, 2s4u style

Image
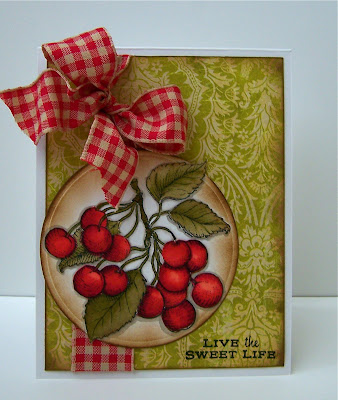
A new sketch is up over at 2sketches4you , and a new sponsor, Living Rooms Direct . With my sketch, I took inspiration from their site and one of the chairs (picture below). Doesn't that print look a lot like the Jenni Bowlin paper I used in my card, so cool. I had to add a little red contrast, if I owned that chair I could see myself putting a red pillow on it. I hope you get to play along this week, the sponsor is offering a nice prize. "fo llow your own star"

Blog Hop and Blog Candy

Image
If you just came from Julie's blog, you are in the right spot, if not go back to the beginning at the Paper Maniac Blog . Today the design team is doing a Pre Grand Opening blog hop. Here is my card that I made using the 100% Happy Unity Store kit. "sweetness" Leave a comment at my blog as well as the Paper Maniac blog for your chance to win this awesome blog candy prize, which includes, Unity 100% Happy kit, Nikki Sivils dp, Cord Brads, Robin's Nes tear drops, American Crafts Thickers, Pack of flair, Chipboard shapes. You have until Sept 6th to leave a comment and on Sept 7th the winner will be announced. The Paper Maniac store is having a grand opening sale, 15% off of everything using the coupon code GRAND15, valid Sept 1st-6th. The next person on the blog hop is Rache l !!

Masking

Image
Today over at the Flourishes Newsletter , Cindy is giving a tutorial on masking. Masking is a fun and easy technique that gives you some different ways to use your stamps. I don't have a tutorial for you, but here is the steps I did for my stamped ornaments. 1. Stamp circular ornament onto card stock, and then once again onto your eclipse tape . 2. Cut out image from the eclipse tape, and place it over the stamped image 3. Using the long ornament image, stamp it next to the ornament, making sure a little is going over the circular ornament. 4. Stamp the long ornament again onto the eclipse tape, cut it out, and place over the stamped image. 5. Using the pine tree branch image, stamp it along the tops of the ornaments. 6. Remove your masks, and color in your images, you now have a cute little scene. For more masking techniques and ideas head on over to the rest of the Design Team blogs Julie Koerber Cindy Lawrence Christine Okken Leslie Miller Faith Hofrichter

Get Well

Image
Well its Wednesday, and the week is going pretty well so far, the kids are adjusting to their new schools, and I need to use my time better during the day while they are gone. Time really goes by so fast, I'm already missing my slow summer days. I still have a little Early Bird paper (cosmo cricket) and chipboard left, so I have been using it up. This is a fairly easy card, some kraft card stock, some scrap paper, chipboard sticker and ribbon. The sentiments are both from Papertrey Ink.

Hi!

Image
Well if you are like me and many other Mother's, you dropped off your children today for their first day of school.  I absolutely love spending summers with my children, so I'm a little sad that it has ended.  Today I plan on going for a run, and then coming home to bake some banana nut bread and cookies.   Then if I have time make a few cards.  If you have extra time today, you should head on over to 2ketches4you , Laura has a new sketch up, and a new sponsor, EAD.  EAD creates these really cool rub-ons, and they are big so they would work perfect for card making and scrap-booking.  "hi"

Better with a Friend

Image
Happy Friday!!  Today Stacy has challenged us to distress.  I really don't distress a lot, but I do love the look of it, and add so much texture to your card.  For Stacy's tutorial head on over to the Flourishes Newsletter . So yesterday, I took my daughter to her 8th grade orientation, basically she got her schedule and found her classes.  We home schooled our children last year, so she has missed most of the Jr. High drama, so I am freaking out a little bit, I don't think she is ready for the "mean girls".  Kendall is the sweetest girl, very studious, polite, kind and still says, "yes ma'am & yes sir".  Sometimes I can't believe I have raised such a wonderful person.   Both of my children start school on Monday, and with my hubby gone, I don't have anyone to go out to breakfast with that morning.  I have had a tradition since my daughter was in Kindergarten, I drop her off at school on the first day of school and then go to breakfast w

100% Happy

Image
My Unity store kit, 100% Happy, came in the mail today...woohoo, I love this kit!!  I got mine from Paper Manic, and Patty has it on sale right now too!  This is a limited edition kit that you can only find in stores, so pick yours up now before the September kit comes out.  I stamped my image in Memento, and then colored in the pear with Copic Markers.  After, my image was colored in, I cut and embossed the cardstock using a square scalloped Spellbinder die.  I paired it (hee hee pair lol), with some pear Reminise designer paper.  I adhered my square panel down, then poked two holes through my paper, and ran ribbon through, to tie a bow.  To finish it off I added a button.  This card makes me smile.  I hope you have a wonderful day today! "100% Happy"

Patience: 2s4y new sketch is up

Image
There is a new sketch and sponsor, Clear and Simple stamps, which were so fun to play with!!  Head on over to 2sketches4you for more details!  I stamped my flower, and colored it in with Copic markers, the designer paper is Cosmo Cricket and the ribbon is PTI, and of course my circle and scalloped square are Spellbinders Nestabilities.  Sorry this post is short but I have a lot of errands to do today!  I hope your week starts out wonderful, and you have time to play along with us this week! "patience"

sets are available

The sets I previewed the last few days are now available!! www.flourishes.org

Gerbera Daisies Day 3 of sneak peeks

Image
Today is the last day of sneak peeks for the August release, and its called Gerbera Daisies.  For my card I used the larger daisy image, then colored it in using lighter shades, to kind of make them look like wild flowers.  After I colored my image, it kind of put me in a vintage mood, so I paired my flowers with some Jenni Bowlin paper, black and cream gingham ribbon and lace trim...oh and some buttons (I love my buttons).  If you like what you see so far, head on over to the Flourishes Newsletter , they are having a one day only blog candy and giving this set away to one lucky person!! Tonight will be the Power Hour release party over on Splitcoaststampers , I hope you decide to join us 9-10 central time, you will get to see all the sets in their entirety and have a chance to win some prizes. If you think the fun ends after the release party wraps... well, we have something a little extra for you! Did you enter our Fit for Royalty challenge??? If so, you'll want to check back tom

Baby Love: day #2 of sneaks

Image
Day #2 Sneak of Baby Love Today I get to show a card using some really precious images.  Tomorrow Flourishes will be releasing a stamp set called Baby Love and the title really does say it all.  I remember when my children were babies (sniff, sniff...I know I'm such a sap), I would rock them in our rocking chair and just watch them sleep.  Just looking at a rocking chair now can bring back those strong memories, I can even remember the smell of them, isn't the smell of a baby the best!  From the moment I saw this set, I was knew I was going to ink up the chair first...now isn't that sentiment perfect.  For your chance to win this set, go to the Flourishes Newsletter ...they are having a one day only blog candy, so go and leave a comment!!   "For Mommy and Me" For more projects using this set, be sure to visit the rest of the design team Chistine Okken Julie Koerbe r Laura Fredrickson Leslie Miller Faith Hofrichter Cindy Lawrence Stacy Morgan Nancy Kirk Flourishes

Day 1 of August Sneak Peaks

Image
Its that time of the month again!  Today I'm showing a sneak peak of Cherries & Peaches stamp set along with the Basket Weave background stamp.  For a chance to win both of these stamp sets, head on over to the Flourishes Newsletter , they are having a one day only blog candy!!  Because I'm showing 3 cards today, I will try and keep my "talking" short.  All three cards have a more simpler design, and for the first two I used Copic Markers as my coloring medium.   For this first card, I started out by stamping this cherry image onto Flourishes Classic White card stock, using Palette Noir ink  The cherries required so much blending, and to blend well the ink needs to be wet so each cherry was colored individually.  The colors I used were R20, R24, R27, R29 & R59 ( Poppy Collection ) for the cherries and then for the leaves YG91, YG93, YG95 & YG99 ( Evergreen Collection ).  After my image was colored in I cut it out and set it aside.  Next I cut and embossed

Come on over: Laura's sketch #32

Image
I have been itching to show this card!!  The card I'm sharing today, I just love, it was fun to make and I hope you enjoy it too.  This week's sponsor over at 2sketches4you is The Cutting Cafe.  I chose to use this cute house file, there were many files to choose from, but the house just spoke to me.  The Cutting Cafe files really are easy to use and come with great directions.  After I printed out my house, roof, scalloped border etc.. I used Basic Grey June Bug 6 x 6 designer paper to cover my card stock.  Once my dp was cut out, I distressed the edges with a dauber using Tim Holtz Fired Brick ink.   It took me forever to figure out what I was going to put on this card for embellishments, then I went through my buttons and found some that matched the designer paper perfectly (PTI) so thats what I went with.  The window and door that came in the file, didn't flow with the sketch I had to work with, so I just made my own.  I hope you decide to play along this week Regina

Room for Baby

Image
Holy moly all the sudden!!  There is a baby boom going on, it seems like so many women I know are pregnant right now, totally staying away from whatever they are drinking lol.  So, I'm getting a head start on my "baby" cards.  I went to a few scrapbook stores on Thursday, so I played with some new goodies, isn't that always so fun!?!  The main scalloped square is a die, from a Crate Paper 12 x12 die cut sheet, all of the "pop" out dies are glittery and super cute.  The patterned paper is Basic Grey Lemonade & Bazzill embossed polka dotted paper, I made that border on the pink paper using my new Fiskars Apron Lace border punch.  I tied my satin ribbon (May Arts 3/8 in celery), then I took some letters from a Creative Imaginations glittered foam alpha sticker set (boy that was a mouthful lol).  So this was a no stamping card, it was fun and different with a cute result.  I hope you have a wonderful Saturday!! "Room for Baby"

Birthday Challenge

Image
With Flourishes celebrating their second birthday, they know their customers are worth their weight in gold! To get ready for our smash release in August, we wanted to set the scene by honoring our customers who we consider - royalty!  HOW TO PLAY: Try to create a card fit for a king or queen! Use regal embellishments, a lavish paper, a beautiful image, glitz it up! Link your creation to the post on the Flourishes Newsletter or upload to Splitcoast using the keyword FLLCAUG. You have until Friday, August 14th 10th at 5 PM Eastern to have your creation uploaded! We can't wait to see what you come up with! WHAT YOU COULD WIN: All of our new releases that will be revealed starting next Wednesday, August 12th over on the Flourishes Newsletter. Isn't the Lace Heart set pretty!  I think all the flourishes going through the heart, give it that little extra special touch.  I stamped the heart onto some classic ivory card stock , with Palette ink, and then colored in the image using C

For You

I bought the Kenner Road kit from June, and I am having a challenge with myself to use all the yummy goodness before I buy another kit.  So, here is a tall clean and simple card using some Cosmo Cricket paper, chipboard and some cream ribbon.  Super easy and cute!  The card base is Prism textured cardstock, love that stuff and it really adds alot especially when you are making a simple card.  Tall cards are fun to make, I need to start making more of them!  I hope things are well in your neck of the woods.  Today I get to go meet a new baby boy, one of my local friends just delivered him yesterday, gotta get my baby fix in!! "For You" OUT FOR  PUBLICATION

New sketch...Kazan's 32

Image
Type your way over to 2sketches4you , there is a new sketch and new sponsor, May Arts ribbon!!  Hands down, May Arts ribbon is my favorite ribbon brand, they just have such a huge selection.  I had so much fun making this card, its quite big, and I normally don't make large cards, but I had my mind made on the paper, stamps and ribbon I was going to use, so large card it is.   Kazan's Sketch materials used: May Arts ribbon & twine Cosmo Cricket designer paper, Bazzil green, kraft, Flourishes white card stock Spellbinders die Copic Markers button Hannah Stamps, PTI sentiment I want to apologize before you look at this next card, its after midnight and we just got back from Walt Disney World, and I forgot to take a picture of this card before we left...So the lighting is terrible and it does not look too nice, but I promise I will take a new picture later today, and you can see its a not so bad :)  Make a note, always, always, always use natural light for the best photograph.

Day Trip

Image
No crafty project today, my husband and I are taking a day trip with the kids to Disney's Hollywood Studios & maybe hop to other parks, but the focus today is this awesome park!  See you tomorrow!!

FLIP program

Are you ready to know what the FLIP secret it is... head on over to the Flourishes Newsletter for the new incentive program for customers...so super cool!!