Posts

Showing posts with the label stampin up

Lawn Fawn & Punky Sprouts mini album

Image
This past fall, my daughter like many High School students out there, went to a Homecoming Dance.  She went with a group of girlfriends, they all ended up staying the night, eating, chatting and actually scrapbooking.  While they were at the dance, I had pictures developed, so when they returned their pictures were sitting on top of new scrapbooks.  It was a fun night for sure. Well, my daughter still has not put her pictures into her scrapbook lol.  So when Punky Sprouts sent us these mini albums, I knew right away that I was going to use some of the pictures from Homecoming.  Kendall turned 17 yesterday, so it was a perfect time to give it to her.  Kendall loves the colors blue and green, so using the Daphne's Closet line of paper and stickers was a perfect fit. Here is what the album looks like from the front.  I am using the Soul Sprout mini album . For this page, I used the Feather Turquoise Narrator Stickers , Daphne's Closet Element...

Hi!

Image
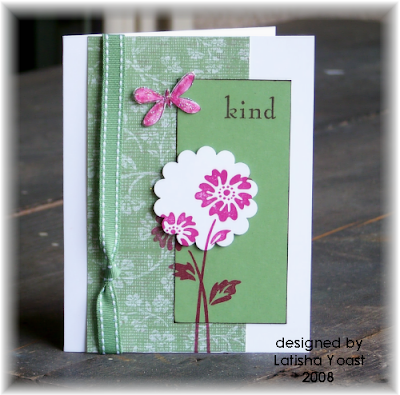
Today's color challenge CC:186 over on Splitcoaststampers is Really Rust, Chocolate Chip and Baja Breeze, I don't have any Baja Breeze, so I used Sage Shadow instead.  The color challenges help me out with getting started on a card, its almost cheating because its makes it too easy :)  I originally had some patterned paper where the larger white paper is, but it didn't look right so I replaced it with the white, it gives it a cleaner look. A few weeks ago I won the Floral Fantastical stamp set from Unity, its a fun & whimsy set so I choose the butterfly.  I colored it in with Copics, but it would look really pretty paper pieced to with some nice patterned paper (for those of you who don't like markers any more lol).  The sage looking ribbon is from Making Memories Passport collection of ribbon. So who else is excited that fall tv is back...my favorite show is Greys Anatomy! "hi" chocolate chip, really rust & sage shadow card stock, prism paper, Unity s...

Happiness and a trick/technique

Image
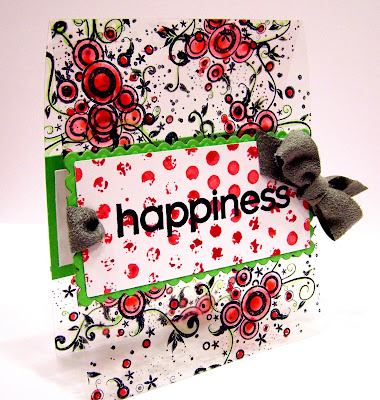
So who of you out there have reinkers?  Yesterday I got all 6 in colors of the reinkers (thanks to my DSS...secret sister) is that not awesome or what!  Reinkers are really versatile and you can do so much with them.  I added a few drops of the riding hood red in a bowl and added some water, until I got the color I wanted.  I used the mixed solution to water color on the back (rough side) of this acetate.  Here are step by step directions to what I did: 1.  stamp image with stazon on the rough side of the acetate 2.  Heat set ink 3.  watercolor in your image with reinker solution 4.  Heat set 5. Use Copic marker or another colored solution to add a different color. I used the same mixed solution, took a paint brush & brushed on the ink for the distressed polka dotted background stamp.  It worked so good! {the dots are supposed to look like that its a distressed style of stamp}  I heat set the paper with the dots too, so the ink would not run. ***Also using the same ink and water so...

Swap

Image
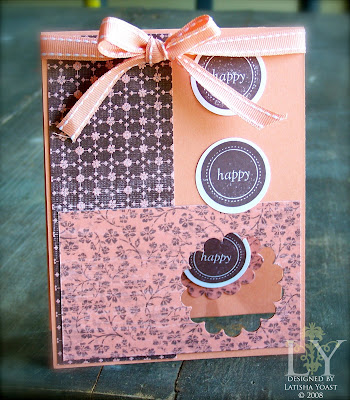
This is my second card {made 8 of them} for the swap I am in that Alex is doing. Its a fairly easy card to make. Just a lot of punching out to do. I am not sure what the technique is called but its where you make a punch in the front of the card and then on the bottom of the cardstock {inside of card} you put something there where the hole is. Does this make sense? I cannot think lately. Anyhow, I put the piece of dp that I punched out on the inside and then stamped "happy" punched it out using a circle punch and then layered it on using a dimensional so it puffs up above the card. This is an all SU card. Can you tell I have a ton of Groovy Guava stuff lol... I was in a monochromatic mood. The dp is Afternoon Tea, I used Groovy Guava and Whisper White card stock and the ribbon is double stitched grosgrain ribbon, oh and the ink is Chocolate Chip. The card wasn't laying flat but you can kind of see how it looks laying down, then I put another picture of the inside ...

Kind swap

Image
I have four of these completely finished and then the other four are cut up, stamped and just need to be put together. They will go in the mail tomorrow off to Alex. Its an all SU swap. So everything you see can be found in the current Stampin Up catalog. Well I need to go finish putting my swaps together, so this will be a short post. Here is the recipe for this card: Live your dream stamp set Sweet shapes stamp set Baroque Motifs Wild Wasabi cardstock, whisper white cardstock Afternoon Tea designer paper Double stitched grograin ribbon, Purely Pomegranite & Chocolate Chip ink Scallop punch

funky chicken

Image
So here is a card I actually made the other night, but couldn't post it. I'm mailing it to one of my best friends Chris. She is having surgery tomorrow, so I hope this bright card will make her smile. I wanted to watercolor an animal, but I don't have too many animal stamps, so this neglected uninked chicken worked perfect. I stamped the image in black stazon ink, colored her in with prisma watercolor pencils & used a blending medium and stump to blend the colors together. This stamp is actually really big, but after I punched it out with a marvy scalloped circle punch {the really big one} it made it easier to work with. I layered it onto real read cardstock, which makes the yellow really pop. The polka dot paper is actually from a 12x12 Christmas paper stack that I got at Hobby Lobby or Joanns. After I cut it to size, I got out my SU corner rounder and took off the plastic protector, and stamped along one edge of the polka dot paper & it creates a scallope...

TECC12

Image
Jacob has a little flu thing going on. So guess who got to sleep on the floor with him last night? Any guesses? Yep me lol. Around 5:30 am the bathroom floor got the best of me, it was so hard and uncomfortable I had to get up. So whats a girl to do with her children and husband asleep, but to blog hop and make some cards. I always check out Taylors blog { www.tayloredexpressions.blogspot.com } but I don't think I'm worthy enough even to post a comment. Have you seen the stuff she makes? She is amazing! For those of you who are PTI freaks you know exactly who she is. Anyhow, Taylor has a cupcake challenge, to use her sketch {below} and she will pick a winner and you will get this stamp set. How awesome is that...VERY!! The only thing is, you have to get your card submitted by tomorrow morning 8am PST. All you do is leave a comment on the challenge post and link her to your blog or on your split coast gallery {upload using TECC12}. I really don't have any cupcake stamps e...

Verve Honored Guest Challenge #2

Image
So yesterday I really needed to get out so I found a scrapbooking store out of Pape r Trends, and it happens to be really close to me. Well the store had some yummy black May Arts ribbon. I saw this ribbon first In Jan Marie's ordering room, but I was about to move and couldn't be buying stuff then. So I picked up 6 yards of it {its the ribbon on the left side of the card, not the organdy} I think I might use it on my swap I have coming up, hmmm have to think about that >" So, Verve Visual is having their 2nd Honored Guest challenge. The card needs to be a long card. Mine is 3x6 is that considered long? I think so>" Before I really looked at the sketch I knew I was going to use this ribbon and kraft paper. After a look at my cardstock, I noticed I was still hoarding the Aqua Mist paper from Papertrey, so I cut away and it didn't hurt. I actually didn't care. Normally when I have been hoarding something like paper, when I cut into it I get a li...

Verve inspiration pillow challenge

Image
I know this isn't the best picture, but holy moly is it bright outside & t oo dark inside, so this is the best I could come up with. Anyhow, this card is an inspiration challenge going on at Verve you can link to it here http://vervevisual.blogspot.com/2008/04/another-vervalicious-challenge-for-you.html the winner will get $15 in verve bucks to spend at the store. Now that we have the deets , on to the card. I took my inspiration from the colors and the detailed flowers. If you have Verve stamps they wanted to use them and since I only have two of her sets {need to get more} I was a little limited but I made it work with some creative thinking. I'm not sure if its a requirement to use Verve stamps or not I guess I should have re-read the post before starting. It made it fun for me having a limited amount of stamps to work with. Sometimes when you have to choose from a jamillion {yes that's a word, ask a 5 year old lol } stamps its overwhelming. I really lucked out...

acetate card

Image
Right before I moved I recieved this stamp set from Verve Visual. Julee who owns the company has a blog www.poeticartistry.blogspot.com so go check her out she does weekly sketch challenges. Oh the website to the store is www.vervevisual.com . I knew I wanted to use acetate/vinyl and some Cosmo Cricket paper I have been hoarding. So this card came together very easy, don't you just love that when that happens. I had no intentions on sending this card to anyone, I just made it for fun. However, when my inlaws came for Jesse's winging, we found out Jesse's step-brother Rusty eloped to Mexico. So I gave this card to Karen {mother in law} to send to the new couple. Oh when you use acetate or vinyl you need to use a permanent ink like stazon, there are other brands too, this is just what I used for this card. The ribbon is chocolate chip grosgrain ribbon by Stampin Up.

verve visual sketch & bday card for Gabe

Image
If you go over to www.vervevisual.blogspot.com they are having a Guest Designer contest. There is a sketch posted & you need to make a card using the sketch. So here is my first card {I plan on submitting a few cards} you can enter as many times as you want. This card is for a little boy named Gabe who just turned 8 yrs old. I have the hardest time making masuline cards without it being to froo froo {girly} I am glad this card is going to an eight year old who will not notice I really messed up on the gromets. I am still new at using my new big bite and I didn't place the gromet on the right, in the *right* place...it should be a little more to the left. Since I was using a dark background paper I needed to fix it somehow to not seem blah. So I cuttelbug-ed the layers with the textile embossing folder, then lightly went over the raised part with Tim Holtz distress ink in walnut stain. I had originally stamped faux stitches using all in a row by SU, but I didn't li...

birthday card for Savannah

Image
I made this card for the sweetest little girl Savannah who just turned two. I don't get to see her very often (since we live in different states) but I wanted to send a card to let her know I was thinking of her (her mom anyway...don't think Savannah remembers me) Erica who is Savannah's mom, we have been friends since we were 14 years old...not to give my age away but its going on 18 years this year. My husband is in the military and we left California when my oldest was three years old. So it makes me sad sometimes knowing our kids can't grow up together and get to know each other better. Jess and I are really lucky to have great friends we have found during our travels. Most of them we consider family now. So even though we miss our family and friends in California, in each new town we meet people who welcome us in with open arms and it as though we have known each other forever. In case they are reading I have to thank three woman who have blessed me with t...

more thank you cards :)

Image
After my daughter finished & sent out her thank you cards I thought it might be a good time to finish mine :) My inspiration came from some newly bought May Arts ribbon. Its double sided stitched satin ribbon, I love it and have it in many different colors. I find it much easier to make a card if I have an idea of what I want to use, be it ribbon, paper or a stamp etc. The ribbon is pretty close to purely pomegranite and barely banana (SU colors), so I grabbed the cardstock in those colors. Then I went through my designer paper and looked for a sheet that matched both. I chose a BasicGrey paper from the Blush line. The image is from Michael's dollar bin stamped in purely pomegranite. I ran the barely banana cardstock through my Cuddlebug using the thank you embossing folder. If a card looks too plain and I don't want to use more designer paper, I will dry emboss the background. It makes a card pop without spending anymore money on it. I think that is what prevents me from s...

Mojo #20

Image
This is going to have to be a quick post because I am running out the door, to go pick up my goodies from Flourishes (they are a new scs memeber company & they are based about 18 min. away from me!) Anyhow, here is my entry for Julee's Mojo #20, check her out www.poeticartistry.blogspot.com she posts a new sketch every Monday. I will come back later and edit this post and tell you what I used to make this. Have a Happy Friday everyone!!!

Nicola's Sketch #2

Image
If you go over to Nicola's blog www.mypaperworld.blogspot.com this is sketch #2, that I played around with. Its a fun sketch, so go check her out, she has a few sample idea cards to get your creativity flowing :) Sketches are great when you are having mojo block. Materials used: River Rock cardstock by SU, Ginger blossom designer paper by SU, Images from SU sets, Heartfelt Thanks and Sweet Shapes, Cameo Coral ink, Black Stazon ink, Mellow Moss ink, Chocolate Chip satin ribbon, white chipboard from Crafty Secrets, white flowers from Prima, silver brads by MM, Cuttlebug textile embossing folder

thank you card

Image
I made this card for Sara, she has hosted 3 Papertrey swaps now on SCS, so I put this in with my swaps as a thank you note. The images are from the set Sweet Love by Papertrey ink. I used white cardstock as the base and layered it with Cosmo Cricket paper. I stamped the hearts in black stazon ink. The tab on the top was made by using a SU tab punch (I love that thing). The next layer is in white cardstock, stamped with Palette L'Amore Red and black stazon ink. I had some retired SU organdy ribbon, so I stamped that too and attached it with a staple. I just wanted to say thank you to her, hosting a swap I imagine can be very stressful at times. The size of this card is 4x4 which I don't normally make, but square cards are fun to do, to change it up a little :)

Swaps are done :)

Image
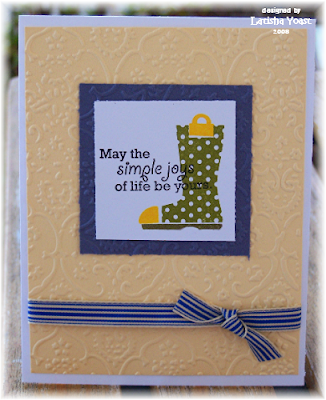
I meant to post this card on Friday...but my husband had to go out of town and he took my camera. That meant no uploading pics for me. Last week I was struggling with finding my creativity, everything that I made I did not like. I'm sure the cards were fine but they all lacked something that I couldn't figure out. So I went back to this simple sketch that I use when my mojo is not flowing :) For some reason the yellow on the boot is showing up really bright, but in real life its more subtle and blends well. I used the Green Thumb stamp set from Papertrey ink. This is one of my favorite sets by them. The yellow and blue paper are from SU , they are retired so I have no idea what the real color name is...? I stamped the sentiment in stazon black, and the boot is stamped in old olive & summer sun. The ribbon is from May Arts, when I bought the ribbon I only bought a few yards, so I have been hoarding it. However, it went well with the card, so that ribbon had to...

Working on Swaps

Image
I have to get my papertreyink swaps done! I thought this was it until I realized there is no embellishment on the card. Each swap has to have at least two layers and an embellishment. Maybe I will add ribbon or brads. I used the new SU ginger blossom paper. The flowers are all stamped in Ruby Red, the flowers that are lighter in color are still in Ruby Red. I just did generation stamping, its when you keep stamping the same image without re inking . I distressed the edges of the whisper white and river rock paper with a ruby red stamp pad just to make the paper pop, sometimes it just makes a card flow better. The stems are stamped in mellow moss which is now a retired color from SU , but it looks a lot like river rock so I used it. All of the images are from the Green Thumb set from Papertreyink . I know its an older set, but I just bought it so its new to me, and I love it! Its has a great springtime feel to it, which I cannot wait for...I do not do well in cold weather,...

I think I got my "mojo" back!

Image
So I'm done traveling, my dad is back in CA, (he was here for about 11 days) my husband is back to work and the kids go back to school on Monday. It has been a very busy last few weeks. Not to mention I am battling with a minor Crohn's flare up. I keep telling myself I have been through worse than this, so things are going to be OK. Well I made a compostition book like this for my neice Wentir (sounds like winter) for Christmas, because she loves to write and draw. Plus my brother and her mom can never find anything with her name on it. So I guess the morning of Christmas she opened up her present from me (well the comp book) and she was so excited that she had her own book with her name on it. The whole time I was altering her book I kept thinking that I wanted it, and an 8 year old isn't going to care about some notebook. So I was happy to hear my hard work was appreciated. Back to this composition book lol. I am in a Papertrey ink swap and I have a ton of thank you card...

Cookie Swap

Image
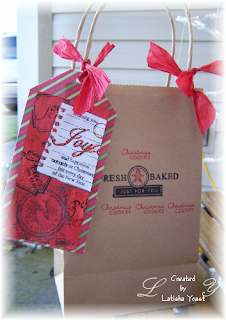
So I am in this cookie swap and I have to make 11 dozen brownies...yes you read right 132 brownies. Well I went to all of the stores to get some containers to put them in, but they are not cheap. $4 dollars isn't much money, but when you times it by 11...thats $44, and most likely they will end up throwing the container away. I am extremely busy in my life right now, but I had some time to make these bags instead of buying containers. Inside of the bag will be a cellophane bag which the brownies will go into to keep them fresh. Have any of you been checking out Tim Holtz's blog lately? Well I have and he has inspired me to make a cute tag. Now this isn't the best tag I have ever made, but I do like it. And to be completely honest, I took some cold medicine and made this about 1/2 after I took it, I really should have stopped and went to bed, but I really wanted to finish it. When the brownies are cooling I am going to make recipe cards to go inside the bag as well. Once ...