Posts

Showing posts from March, 2009

Mid Week release from Flourishes

Image
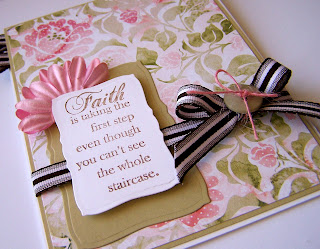
What a better way to start your Wednesday then a mid week special, Flourishes style.  While I was away at Disney, this cute set was at home waiting for me.  This is Gigi and Chloe, they are Sophie's friends.  I think the sentiments are so fun and so me lol, if you know me you know I love love love to shop, I think I'm a professional shopper lol.  In college I was a personal shopper at Macy's for rich woman, it was one of the better jobs I've had, spending other peoples money.  Anyhow, back to the card, for all the details on this Sophie's special, visit the Flourishes Newsletter blog. I stamped the image and colored her in with pencils and blended the colors using gamsol.  If you do not want to invest in Copic markers, this is a great way to color in your images, plus you have a little more control of the color using this technique.  The paper, ribbon and buttons are all from Basic Grey (Urban Prairie & two scoops) and that yummy ribbon is the new silk May Arts

Lots O pics from WDW

Image
Here are some (I really mean some, I took hundreds of pics) from our week trip/vacation to Walt Disney World, Jess even surprised us Thursday and stayed a few days too. Kendall and Jacob  us at the Magic Kingdom kids in front of the castle Kendall on the Astro Orbiter (i think) Jacob and Stitch Kendall and Tina Fey (famous actress) Jacob and myself us with Minnie and the big Cheese Alice checking out Jacob's pins Alice talking to Kendall about her earings kids and Pooh at the Crystal Palace (yummy brunch buffet) Are those topiaries not gorgeous! The kids did the Kim Possible challenge/scavenger hunt with their Kim-unicator World Showcase Mexico Jacob and I on our way to get ice cream Kendall doing a virtual game at Disney Quest The kids LOVED Disney Quest (we went twice) We went to a Braves game too, Braves vs Detroit Tigers I was not feeling good at the game  {mellisa and I drank too much, which = hangover} but a Philly Cheese Steak sandwich, nachos, Cracker Jack and a Lemonade sl

With Gratitude

Image
Wow, I think I need another day to recover from Walt Disney World.  We had a wonderful trip! I will show pictures later.  For now, here is a true one layer card.  I stamped Ornamental Elements in L'Amore red Palette ink, and didn't want to take anything away from the pretty flourishes, so I added a bow in the center and the sentiment at the bottom.  To get the bow to stay in place, I punched two holes using a Cropodile Big Bite, then weaved the ribbon through and tied the bow.  The ribbon, stamps, ink, and rhinestones can all be found at Flourishes .   "one layered thanks"

Unity Inspirational Blog Hop

Image
"The only way to have a friend is to be one" Ralph Waldo Emerson Here is my card for the Unity Inspirational Blog Hop.  Its clean and simple and in kraft which equals perfection :) "Snail Mail" The next blog on the list is Kerry materials used: February Unity Kit of the month kraft & white card stock satin ribbon Copic markers MM hat pin Labels 1 die

Ribbon tutorial

Image
Today I'm hosting the Flourishes Friday over on the Flourishes Newsletter.  My challenge is making a clean and simple card without designer paper, but with a bow.  Head on over to the Flourishes Newsletter blog , and I have a video tutorial on how I tied the ribbon on this card (below).  Also if you scroll down my blog you will see that I used ribbon and tied bows on all of my cards this past week, using different types of ribbon, but they were all tied the same way. " Happy Easter" materials used: Ivory card stock Signs of Spring stamp set from Flourishes 3/8 May Arts pink satin ribbon Square Nestabilities Pink Kaiser Rhinestones Check out the rest of the design team and their projects: Julie Koerber Christine Okken Laura Fredrickson Cindy Lawrence Faith Hofrichter Leslie Miller Stacy Morgan Flourishes Newsletter

Hello Friend

Image
Last month I got the Friend stamp set from PTI, and I have to say, its quickly turning into one of my favorites.  I have a ton of Raspberry Fizz dp and card stock, so I'm trying to get through some of it. I can't say enough how much Spellbinders Nestabilities classy up a card, the dies are just awesome!  I used a scalloped square and a smaller square die to cut and emboss my paper.  The front panel with the image is colored in using Copic markers, then popped up on dimmensionals, to give the card a little bit of depth.  The little touch of black contrast helps the image pop and brings your eyes to the center of the card, where the sentiment is. "hello" Tomorrow is Friday, & I'm going to have a video of how I tie my bows >"<

Tweet

Image
Hey peeps, I think today its supposed to be in the mid 80's so we might head to one of the water parks or to Disney Quest today or one of the parks...I know I'm super decisive today lol.  For some reason when I say decisive, I hear G. W. Bush's voice, anyone else?  Maybe its just me, or I watch too much Saturday Night Live.  OK, so here is my last card using Porcelain paper for a while, I really can't help myself the paper is ridiculously awesome!  I have some of the Basic Grey Porcelain element sticker, so I added those on too.  I did a tiny little bit of stamping behind the bird, but other than that, easy peasy card. "Tweet" Materials used: Flourishes With Sympathy stamp set Basic Grey Porcelain dp BG Porcelain elements stickers button, twine, glue dots, satin ribbon

Faith

Image
I am having so much fun playing with the Porcelain line of paper from Basic Grey, its the perfect spring paper!  The sentiment is from the new Timeless Quotes stamp set from Flourishes.  The card base is stampers select white, and the greenish color is River Rock (one of last years in colors).  This paper is so pretty I didn't want to cover it up, so I placed the sentiment in the corner. Our hotel has a bar at the pool, Disney was thinking of parents when they did that, its the best way to relax at night, having a nice glass of wine/beverage while the kids get their last bit of energy out in the pool before we all hit the hay. "faith" Materials Used: Timeless Quotes from Flourishes llc Basic Grey Porcelain designer paper May Arts ribbon button, twine, glue dot, Prima flower Curvy Rectangle Nestabilitie die River Rock & stampers select white card stock

Thanks A Latte

Image
Is this stamp perfect or what!!  I just purchased the Cuppa Joe set from GinaK, and I just love all the images.  There is not a Starbucks (or any coffee shop) close to Walt Disney World and the coffee actually kind of sucks inside the parks (its Nestle) so thats a big bummer, but I will survive.  On my way home you better believe I'm stopping at the first Starbucks I see.   This card is as simple as they come, a true one layer card!  The embossing gives it that little extra touch that makes this card fabby.  Oh and if you have not tried the GinaK luxury card stock, you must give it a try...I'm really loving mine! "Thanks a latte" Materials used: GinaK Luxury Ivory card stock 120 lb weight  Cuppa Joe stamp set from GinaK Sqauare Nestability die Copic Markers Gingahm ribbon

Just because

Image
Well, I'm off to Walt Disney World today, but I have my blog scheduled to do a new post everyday.  On Friday, I actually have a video tutorial on how I tie my bows, so you don't want to miss that. Yesterday's inspiration challenge on SCS were these really cute dresses from an ETSY store, they were dresses for little girls and had the cutest patterns.  I brought out some Imaginisce papers and the cute little stamps from My Favorite Things (the sentiment is PTI) to make this cute card.

Believe

Image
A few days ago, I received a fun little package from Asela .  Included were a few stamped images of hers (she illustrates and designs for GinaK).  So when I saw the limited supply challenge on SCS yesterday to make a card using a flower and soft colors, I immediately went to this orchid image (that she sent) and colored it in with copic markers.  The dotted designer paper is from PTI, as is the satin ribbon.  I cut an embossed the main panel and sentiment using Spellbinders Nestabilities (long rectangle & double ended tag), the purple embellishments on the sentiment are dew drops.   I hope you have an enjoyable Saturday!  I'm off to the baseball fields to watch my little man play some little league.  The hubby is off with our daughter (traveling team) her game is a little more than an hour away from our house...their games are at the same time again, such a bummer, but I guess that is what camcorders are for! "Believe" materials used: PTI stampers select white &

Flourishes Friday and CPS107

Image
One of the toughest and challenging things for stampers is, combining the designs of decorative paper in a card/project.  How can you do this successfully?  Today on the Flourishes Newsletter , Leslie is going to help us see the patterns in decorative paper in a new and artistic way.   For me, if I stick within the same line of paper it helps a lot!  For my first card I used 3 different sheets from the 6x6 Porcelain paper pack from Basic Grey.  Basic Grey always has a great selection of designs that coordinate perfectly.  The great thing about using 6x6 packs, is the scale is sized down (from the original 12x12 sheet), which makes it fantastic for cards.  Picking a design or sketch also helps, so when I saw this weeks sketch from Card Positioning Systems CPS107, I instantly knew I would be able to use multiple sheets of designer paper.  With Easter coming up, I decided to use the Signs of Spring stamp set from Flourishes.  The little chicks are too cute and I have been wanting to ink

Bind it all autograph books

Image
I am so super busy, you have know idea!  The kids and I are headed off to Walt Disney World on Sunday, and boy do I have a ton of stuff to finish up before we leave for the most wonderful place to vacation!  A very good friend of mine is also going, along with some of her family members, so I decided to make all of the kids in our party, autograph books.  I need to make 6 total, and I have 3 finished so far.  I used the 4.1 x 4.1 square chipboard covers from Zutter, it made making these very easy, plus since they are small, I didn't need to use very much binding wire.  To adhere the paper to the covers, I used the red sticky tape...that stuff is extremely strong, so when you use it, make sure you place it perfectly, you only have one shot to get it right.  I decorate the covers before I cut and bind it, it just makes it easier that way.  Some of the paper is old & some new.  The stamps are from PTI, Unity and some Snag-ems.  Today I'm going to work on my children's auto