Posts

Showing posts with the label scrapbook adhesives by 3L

Lawn Fawn & Scrapbook Adhesives by 3L

Image
  Hello Friends! This week Lawn Fawn and Scrapbook Adhesives by 3L are blog hopping daily, with new projects showcasing products from both companies. Here is my project that is on the Lawn Fawn Blog today . (head on over there for more details) Here is my project that is on the Scrapbook Adhesives by 3L blog .

MFT Card Challenges: Sketch 255

Image
Good Morning! Have you ever been in a creative funk?  I know I have. Where you try to make a project and nothing is turning out?  Well, what I love about sketches, is that it gives you a starting point & direction. My card is based off of the MFT Card Challenges sketch #255 .  I switched a few things around, but thats ok, because there are no rules.  You head on over to the Card Challenges blog , look at this weeks sketch, make a card, link up your project & then you might win!!  How fun and easy is that? Here is this weeks sketch: Here is the card that I created from this sketch.  Instead of using a butterfly, I used a coffee cup.  You can put whatever element you want in that corner.  For this time of year, I think a Pumpkin, snowflake, christmas tree or snowman would be so cute!! Supply list: LLD Hug in a Mug stamp set Die-namics Tag Builder Blueprints 4 Wild Cherry Card Stock Blending Card by X-press It ...

MFT Card Challenge Sketch 253

Image
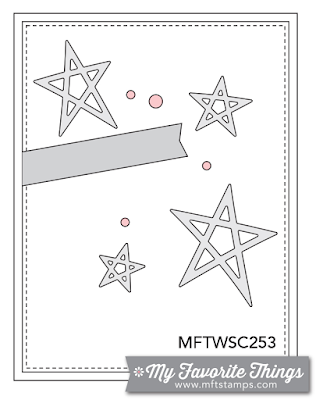
Hello! This month I get to guest design and play with the Card Challenge Team designers.  How fun!!  What I love about sketches is that they are a starting point to get your creative juices flowing, so to speak.  You can follow a sketch down to a "t" or be more liberal, it really is up to you.  Head on over to the Card Challenges blog to see what the other designers created using this sketch! This week is sketch number 253. Here is what I did using this sketch. Here is a simple supply list: 3D Creative Sheets Dodz Crafty Foam tape Clear embossing powder  (to emboss black ink & gold stars) Delicata Gold Ink Pad MFT Sweet Tooth Card Stock MFT Die-namics LLD Lucky Stars MFT Stamps Hand Lettered Holiday other: gold glitter black pigment ink kraft cardstock twine

A few projects to share

Image
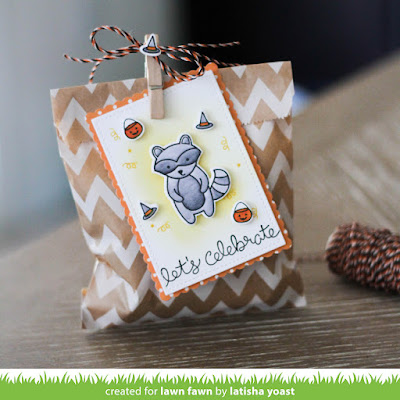
I have a few projects posted on different blogs this week.  So I will share the photo, then the link on where you can get all of the details of my project. This week Lawn Fawn and Chameleon Pens are teaming up.  I created this fun treat bag with Halloween in mind.  Head on over to the Lawn Fawn Blog for more details! I made a "Boo" treat bag.  It is featured over on the Fancy Pants Designs Blog .  Head on over there for the full list of supplies that I used. I created this simple card, and it is featured on the Scrapbook Adhesives by 3L blog . This shaped card and a full tutorial are on the Spellbinders Paper Arts Blog .

Lawn Fawn: Winter Scripty Saying & Scalloped Rectangles Stackables

Image
Hello there! Today is the start of the October inspiration week for Lawn Fawn.  Today, I am sharing a card using the latest stamp set called Winter Scripty Sayings with the Scalloped Rectangle dies. Can you believe that it is mid October already?  Before I know it the holidays will be fast approaching...and I am not ready!  The card I am sharing today, is pretty simple to execute but it has some fun techniques that makes it not so clean and simple.  The great thing about this stamp set are all of the great sentiments!  Since I am making a Christmas card, I settled on the "season's greetings" sentiment. Instructions: 1.  Die cut white cardstock, using a scalloped rectangle die. 2.  At a diagonal apply a strip of washi tape across the diecut. 3.  Using a sponge tool and red ink.  Apply red ink below the washi tape. 4.  Using a darker red ink, stamp the season's greeting sentiment repeatedly to create a fun background...

Lawn Fawn: Happy Harvest

Image
Hello there! I know lots of you out there are sending your children off to school this week (and last), well in the south at least.  That means fall is right around the corner!  Living in Florida means summer kind of drags out to October, so fall here is just a few weeks.  But it truly is fantastic!  Warm days, cooler nights and no humidity. Anyhow, fall means fall projects.  Like Halloween, back to school, Thanksgiving, celebrating the harvest! Lawn Fawn is in the middle of August Inspiration Week, and everything has been fall themed.  Today is no different, as I am showcasing a stamp/die set called Happy Harvest.  Again don't hate me, I'm seriously addicted to this pillow box die, but I made a few pillow boxes using the Happy Harvest stamp set. Make sure you head on over to the Lawn Fawn Blog , to see some fabulous projects by the design team, and for a chance to win this set!! There are so many fun images in this set.  I couldn't d...

Lawn Fawn: Puffy Cloud Borders & Rainbow

Image
Today, I am sharing a few stand alone dies that are brand new to Lawn Fawn.  Stand alone dies, are just dies that can go with any project and do not have a coordinating stamp set to match.  For my project today, I am combining the Puffy Cloud Borders and Rainbow, as well as the hello die. Be sure to head on over to the Lawn Fawn Blog , to win these products as well as to see some great projects using these products! No doubt about it.  These dies to me scream happy!  These would be fantastic to help create fun scenes, especially with the critters.  But for todays card, I created this with just dies (and no stamps can you believe it!).  I can totally see myself using these dies on scrapbook pages as well!  The stitching on the clouds, totally hooked me in, it adds a really nice dimension to the cardstock. This card is pretty easy.  I just die cut everything, and started layering it all on.  I just needed cardstock, the dies, adhes...

Lawn Fawn: Happy Wedding

Image
Today I am sharing a card using the Lawn Fawn stamp set called Happy Wedding with coordinating dies.  I have said this before, but gosh I love having coordinating dies with a stamp set.  It really just adds that extra professional look to a project. There are so many great giveaways this week!  Head on over to the Lawn Fawn Blog to see more great projects and for a chance to win! I started off with a pale aqua blue cardstock, to use as my card base.  Using a new Lawn Fawn ink, i stamped several images from the Happy Wedding stamp set, to create a custom background.  Then, using the stitched oval dies from Lawn Fawn, I diecut two ovals using coral and white cardstock colors.  I stamped the sentiment and images, colored in the love birds with copic markers then adhered the ovals to the card using foam squares.  The card seemed like it needed something, and ribbon was just too overpowering, so I tied a bow using Lawn Fawn trimmings an adhered ...

Lawn Fawn: Milk Carton

Image
As you may or may not know the May Inspiration Week is going on at Lawn Fawn.  There are so many cute new stamps, dies and inks being released this week.  Keep visiting the Lawn Fawn blog to stay up to date on the giveaways, and super cute projects being shown. Today, I am sharing a super cute project using the newest die, Milk Carton.  When you cut paper out twice using this die, and adhere the pieces together, you get this adorable milk carton.  Is this not such a perfect party favor?!  You can put candies, chocolates, almonds, cashews...anything that will fit really! I nstructions: 1. Diecut pattern paper using the Milk Carton die.  You will need 2 pieces. 2. Adhere the diecuts together. 3. Adhere red pattern paper to the top and bottom of the milk carton 4. Stamp/diecut/color the fox from the Party Animal stamp set, adhere to the carton. 5. Stamp sentiment, images then sponge red ink onto white cardstock. 6. Adhere to a clothesp...

Lawn Fawn: Party Animal

Image
Lawn Fawn is releasing new stamps, dies & inks this week.  If you visit the blog everyday, they have daily giveaways as well as one big prize at the end of the week.  You don't want to miss beautiful projects or a chance to win stuff, so check it out!! What I instantly was drawn to when I first saw this stamp set, was the size of the sentiments.  These sentiments are a bit larger than what you are used to seeing from Lawn Fawn, and I am LOVING this size.  Its in a nice font too.  This party animal critter themed set, really is genius.  Plus there are coordinating dies to match the stamps. Here is my card that I made using this set.  See that blue ink at the top.  That is a new dye ink color from Lawn Fawn, called Fish Tank. Instructions: 1. Score card base. 2. Diecut pattern paper, adhere to the card base using foam squares. 3. Trim white cardstock, adhere to the pattern paper. 4. Diecut white cardstock, stamp the sentiment...

Fancy Pants Designs: Summer Sun Card

Image
There are a few spring/summer collection releases from Fancy Pants Designs.  They are called Summer Sun & Making Waves, both have an undertone of nautical + summer, one being super bright and happy with yellows & pinks, and one more traditional with blues & reds.  I adore both of them tremendously.  Today, I am sharing a card using the Summer Sun collection. This combination of colors is one of my favorites, red/pinks, yellow and aqua.  I am always drawn to that combination, add in some whales and anchors and I'm a little smitten for sure!  When you buy a collection, it makes the process so easy, because it all perfectly coordinates!! 1.  Trim cardstock 3 3/4 inches by 5 1/2 inches. 2.  Adhere pattern paper panel to card by using foam tape. 3.  Die cut hearts into a panel of pattern paper. 4.  Using different pattern paper, again die cut hearts. 5.  Adhere the panel to the card using foam squares....

Lawn Fawn: Wheelie Like You & Gingham Backdrops

Image
You know how you first see a stamp set, and you are just so excited...that it even exists because it makes you happy?  That is how I felt when I first saw this mini stamp set from Lawn Fawn called Wheelie Like You.  I mean who doesn't love a hamster?  So cute! The details on my card are below the picture. In the mean time, head on over to the Lawn Fawn blog for more great projects using this stamp set! Instructions: 1. Cut/score card stock to create a card base. 2. Repeatedly stamp the Gingham Backdrop stamp in Mermaid ink, until the white panel is covered.  This creates your own personalized background paper. 3. Diecut lime paper using the stitched circle die. 4. Stamp sentiment in black ink onto the diecut. 5. Stamp hearts onto the diecut. 6. Stamp the hamster and wheel onto white card stock, then die cut them out using coordinating dies. 7. Color in the hamster and wheel using Copic markers. 8. Adhere them to the circle diecut using ...

Lawn Fawn: Critters in the Jungle

Image
Hello there! Today the Lawn Fawn designers also known as the "fawnies" are showcasing projects using the latest critters stamp set called Critters In The Jungle.  It has a monkey, elephant, parrot a snake and a few other images in this set.  The critter sets are always crowd favorites, I especially love to color in the critters. Make sure you head on over to the Lawn Fawn blog , for more inspiration using this stamp set and coordinating dies as well as a chance to win these items! Instructions: 1. cut/score white card stock 2. trim assorted pattern papers to create a rainbow.  adhere down the paper 3. round the bottom corners. 4. stamp "many thanks" sentiment in black ink at the top of the card. 5. stamp leaves and parrot in black ink onto white card stock. 6. die cut images. 7. color in images. 8. adhere diecuts to the card using foam squares. Materials Used: Lawn Fawn Critters in the Jungle stamp set Lawn Fawn Critters in the Jung...

Lawn Fawn: Best Pun Ever

Image
This week Lawn Fawn is showcasing a few stamps and dies for the April Inspiration week. Today I created a card set using the stamp set called Best Pun Ever & coordinating dies. Head on over to the Lawn Fawn blog for more great ideas using this set. One of my favorite things to give away are card sets.  I like to keep a few sets on hand for last minute gifts. Pairing this set with the Lawn Fawn Notecards made this card set really easy to create. Instructions: 1. Die cut white card stock using a stitched circle die.  You will need four diecuts. 2. Stamp the images you plan on using onto white cardstock. 3. Die cut the images out using coordinating dies. 4. Color in images. 5. Stamp sentiments onto the white circle diecuts. 6. Adhere the images to the circles using foam squares. 7. Adhere the circles to the card fronts using foam adhesive. 8. Add washi tape underneath the circles.  This helps to balance out the card.

Quick & Easy Gift Cards

Image
I needed a few super easy gift cards, to give to my children.  I do not get them Easter baskets anymore, just their favorite candies, maybe a small gift and then gift cards. I used a gift card die template for my projects, you don't even need to find a way to enclose them, because they latch shut. I used some Fancy Pants Designs pattern paper & stickers from Everyday Circus and Burlap & Bouquets .  The sticker sheets have a ton of different alphabet fonts, and great little elements that made decorating these gift cards so very easy. Materials Used: Fancy Pants Designs Everyday Circus pattern paper (posters) Fancy Pants Designs Everyday Circus Sticker Fundamentals Fancy Pants Designs Burlap & Bouquets pattern paper (i heart you) Fancy Pants Designs Burlap & Bouquets Sticker Fundamentals washi tape Scrapbook Adhesives by 3L 3D Foam squares

Lawn Fawn: Flirty Frames

Image
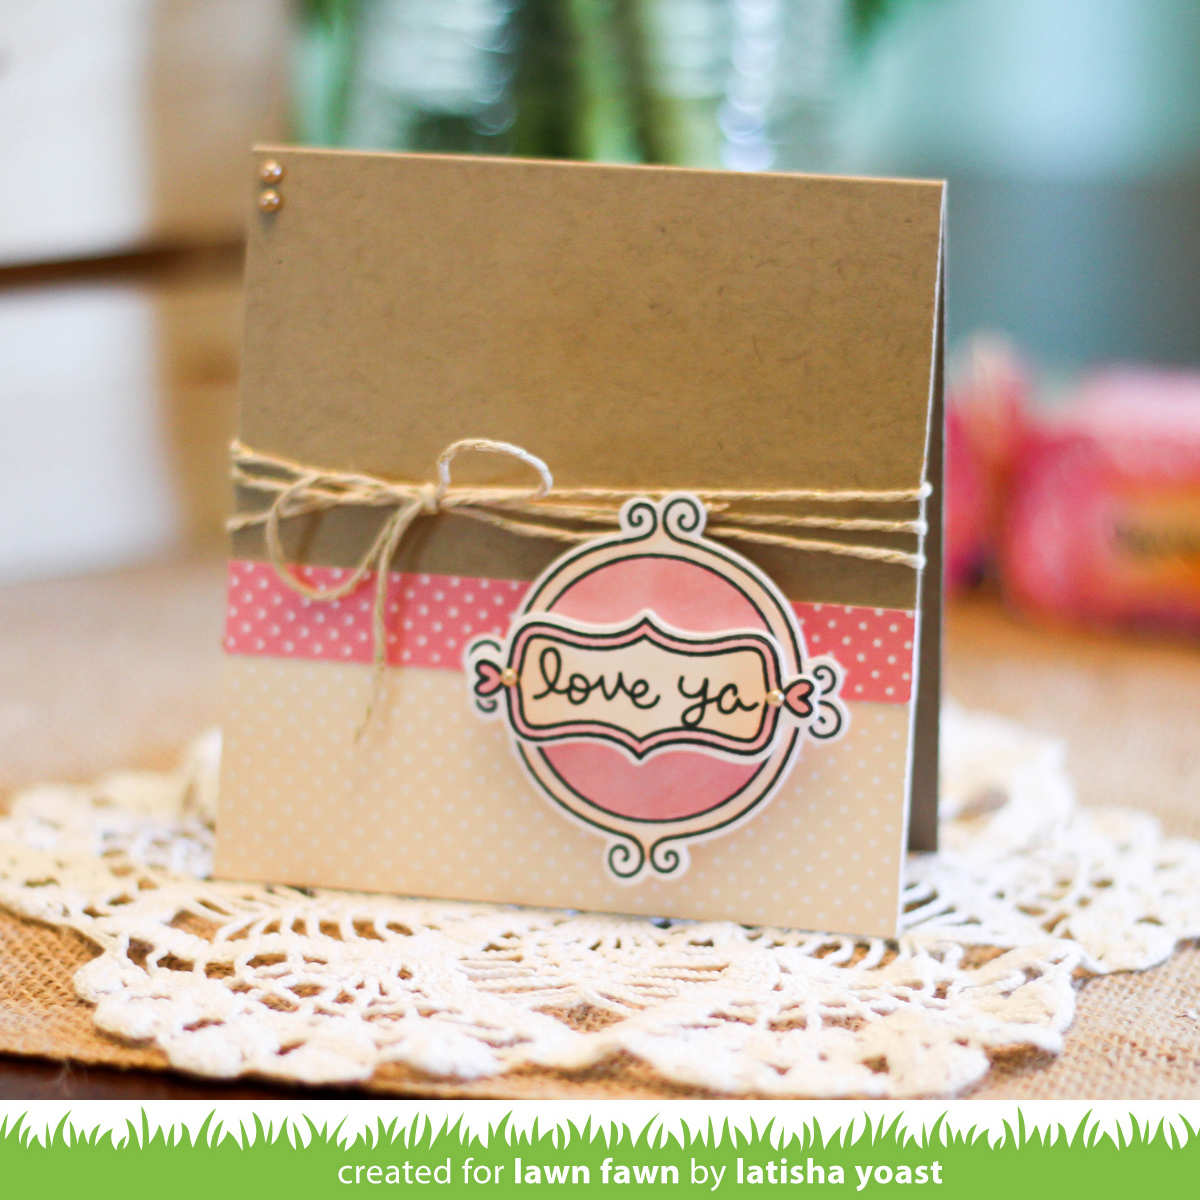
Today, I am sharing a card using the Flirty Frames stamp set and coordinating dies from Lawn Fawn. There are two stamps sets being shown on the Lawn Fawn Blog today, so be sure to head on over there to check out Scripty Sayings! I wanted to create a frame that matched the soft pink, and eggshell colors that are in the Mon Amie Collection.  So I stamped and diecut two frames, colored them in (stamped the sentiment) using Copic markers and adhered them together using foam squares, to give the flat card some dimension. To the card front, I added some pattern paper to coordinate with the stamped images, added twine, adhered the frames and added a few pearls for a soft embellishment.  I really wanted to round the bottom corners, but my corner rounders were no where to be seen, they must have overdosed & passed out somewhere from Valentine's Day chocolate lol.

Lawn Fawn: Candy Box & Stitched Labels dies

Image
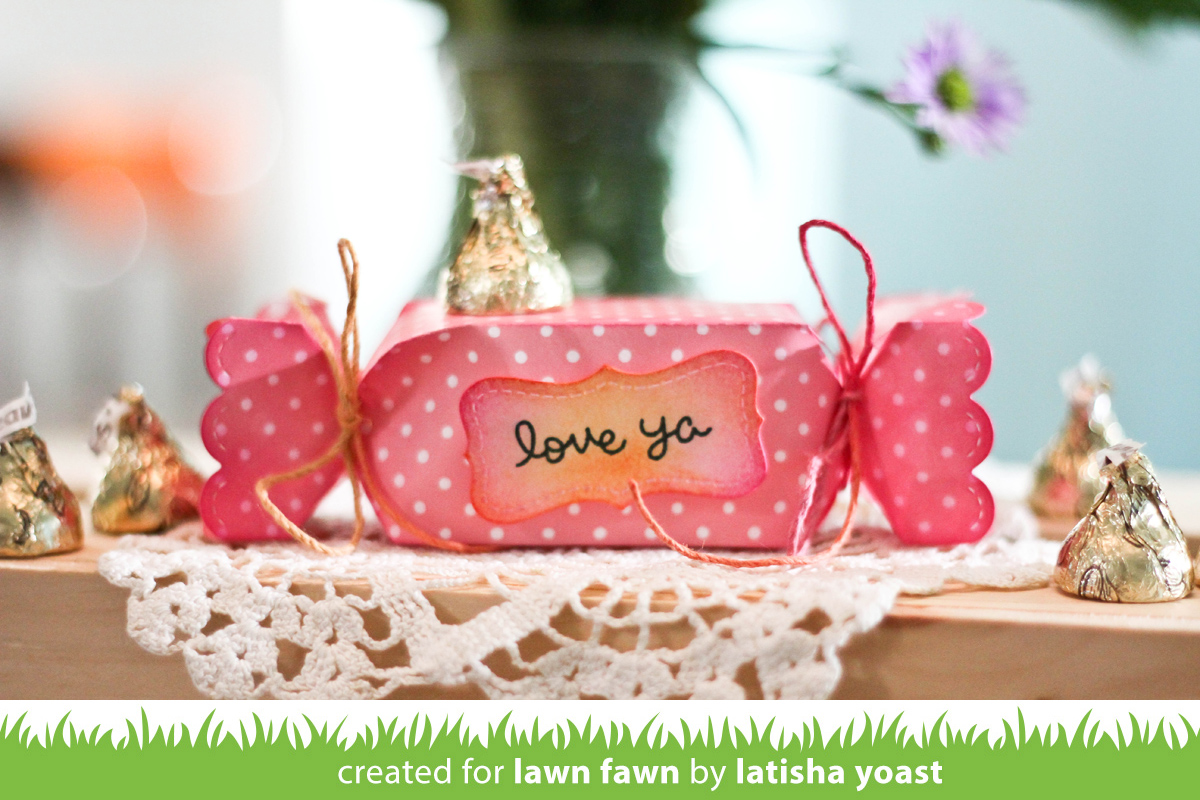
Happy Valentine's Day!! Do you have any special plans today? I have a few gifts for my children, I'm going to craft and maybe go to an early dinner with a friend.  My hubby is away right now, but before he left he gave me a Starbuck's gift card.  He totally gets me!  Love that man. Anyhow, today I am sharing a candy box from Lawn Fawn. So cute right?! It was made from a die people! You just cut it twice, adhere it together and bam, cuteness to store happy things like candy lol. Head on over to the Lawn Fawn blog to see more inspiration from the design team and more great projects...oh and a chance to win these products!! I used the new Lawn Fawn Candy Box die.  I cut it twice, placed adhesive on the edges, and adhered it together.  I tied one of the ends with Lawn Fawn trimmings, then filled it with candy, then tied the other end shut.  To give the candy box a little more oomph I inked the edges, it seemed to make it look more finishe...

Lawn Fawn: Gleeful Gardens

Image
Hello & Happy Valentines Eve! Today I have a super fun and cute card, that is just perfect to send to a friend, family member or just anyone you really like.  I am using the Gleeful Gardens stamp set from Lawn Fawn.  Make sure you head on over to the Lawn Fawn Blog, because they are giving away a ton of stuff this week, not to mention all of the projects are super duper cute!  Like cuteness overboard really, and who doesn't want more cute in their life? Right?! For this card, I did quite a bit of stamping and die cutting.  The great thing about stamps with matching diecuts is that you get a great even border around your stamped image, and no more fussy cutting!  I like to stamp an image, color it in, and then using a low tac tape I secure the dies over the stamped image.  You certainly can have a different process, but this is just works for me. I used a ton of Scrapbook Adhesives by 3L 3D Foam squares for this card, to get all of th...

Will You Be My Valentine?

Image
How is it the end of January? I am blaming Thanksgiving being late, which cause the holidays to blur, add in a lot of travel days, and finding yourself a few weeks from Valentine's Day.  So I guess that means I need to start making a few lovey dovie cards.   The colors of the Meology line from Fancy Pants Designs are so soft, and the palette is really perfect for making romantic cards with.  I stamped directly onto some pattern paper, it wasn't too busy where I would be worried about the pattern over powering the stamped sentiment.   To add more color I stamped the heart in a soft pink color, and distressed the edges with green ink. (sidebar) I am really loving the mini distress ink pads from Ranger (Tim Holtz line) and the round mini sponge blenders. love them. I popped a few of the banner stickers up using 3d Foam Squares, to help give the card a little bit of dimension.  A lot of times if you look at a card and it looks wrong, it could b...

You and Me

Image
For whatever reason most of my blog posts never showed up this month.  But in all fairness to blogger, I "might" have accidentally been using the wrong year to pre-post...oops lol. So Fancy Pants Designs has a new line out called Flutter.  The first thing I immediately noticed about this line was the texture of the paper, it has a little bit of tooth to it.  I might be a little bit heavier than smooth pattern paper.  But the Flutter paper just feels luxurious.   The colors and patterns are really bold, with hues of teal, light and dark pink, black, cream among others (those are the ones sticking out in my mind right now). For this card all I needed to do was cut or adhere most of the items except for the circle die cut.  Right now I making a lot of cards for next years holidays, so that the guys/girls have cards to send home, when my husband deploys. This cards isn't to bulky so it will be perfect to set aside.  I usually send 1000+ cards...