Posts

Showing posts with the label heat embossing

Happy Halloween

Image
Y'all! The Fall and Winter release for Lawn Fawn is here! Brand spanking new, never been seen before...stamps, dies, paper, ink, new tools...so much goodness!! Go follow along this week over on the Lawn Fawn Blog . Today I am sharing a card using a new stamp set called Spooky Village. It has fun houses, and elements to make a halloween scene. I think my favorite part of this set are the bold sentiments. I applied ink to the white woodgrain cardstock, then stamped the houses in black ink and colored them in with copic markers. The sentiment was made with clear ink and white embossing powder, and heat set onto black cardstock.

Reveal Wheel Holiday Sentiments

Image
Hello friends! Today the Lawn Fawn Design Team are showcasing projects using the Reveal Wheel Holiday Sentiments. The original Reveal Wheel stamp/die set is an interactive die set. For those of you who have no desire to make an interactive card, I am showing you how to use this stamp set in a traditional way. I started by stamping several sentiments onto white cardstock with white pigment ink, then heat embossing the sentiments using a clear embossing powder. The cardstock was then diecut using a scalloped stitched rectangle. Next using 3 different ink colors, pink, purple, aqua and ink blending tools, ink was applied.  Since the sentiments were heat embossed, ink will not stick to it, it just wipes off and resists. The critters are from the Say What? Christmas Critters stamp set. They were stamped in black ink, colored in with Copic markers, cut out with scissors and then applied to the panel using foam adhesive. White cardstock was die cut with the Quilted Backdrop die, th...

Say Yes To New Adventures

Image
Hello friends! Today I am sharing a card, that is back to basics.  What do I mean by back to basics? Its stamping 101, what you learn to do when you first begin this hobby.  There is stamping to create a custom background, heat embossing and fussy cutting.  This stamp set is called Adventure Awaits from Technique Tuesday .  If you head on over to the Technique Tuesday blog , you can see this full set along with the rest of the August release. I started this card by, stamping the suitcase images with VersaMark ink onto blue cardstock. Applying embossing powder to the image, then heat setting the powder with a heat cut.  I cut the image out with scissors and set it aside.  Next, I randomly stamped the suitcase over the front of a white card base with navy ink. It seemed a little plain, so the airplanes were added. They were stamped in versamark ink, and embossed with the same embossing powder, so everything perfectly coordinated.  The sentiment w...

Year 8

Image
Today we are supposed to have thunderstorms and tornado watches.  It is definitely spring in the south.  Hopefully this rain will have all of the flowers in bloom in no time.  There is nothing like driving through a neighborhood and all of the azaleas are in bloom.  Its beatiful. Today, I am sharing a card where I heat embossed the kraft card base with versa mark ink, then used the Lawn Fawn rose gold embossing powder to emboss.  It created a niece muted background on the card front.  I again stamped the fortune cookie on white card stock, heat embossed it, then colored it in with Copic markers.  Instead of using the coordinated die, I trimmed around the image with scissors.  I didn't want any of the white card stock to show.  The diecut image was adhered to the card using foam adhesive, as well as the stamped sentiment. To embelllish I adhered twine and yellow nuvo drops to the card front. There are many more projects on the ...

Happy Birthday

Image
Hello friends! Today is a card from the Beam Me Up stamp set from Lawn Fawn.  It has cute little aliens and space crafts, and the sentiments are so punny. When I started this card, I had no idea how long I would be blending that ink lol.  I blended for over an hour, and I thought I was crazy.  But, I love how it turned out and have #noregrets. The stars and sentiment were stamped in white ink, then heat embossed in white embossing powder. For more fun and inspiration, head on over to the Lawn Fawn blog .

Trick or Treat

Image
Hello friends! Did you know that Lawn Fawn now has a few different embossing powders as well as glitter?  For my project today, I did a little bit of water coloring.  Let me tell you a little secret.  When you want to water color images, if you heat emboss the image with embossing powder, it makes the water coloring process so much easier! Especially if you are worried about the color going outside of the lines. 1.  Stamp images in versa mark ink. 2.  Apply Lawn Fawn Gold embossing powder onto the image.  Heat set with a heat gun. 3.  Stamp sentiment in versamark ink, apply silver embossing powder. Heat set 4.  Water color the image. 5.  To ground the image so it doesn't look like its floating on the white card stock, add green water color for grass, and blue for the sky. 6.  Die cut the white card stock with a rectangle die. 7.  Apply the diecut to pattern paper with foam adhesive. 8.  Adhere to a whi...

Snow Cool Distressed & Embossed Card

Image
Hello Friends! Are you following along with the Lawn Fawn September Inspiration Week?  Today I am sharing a card using a few stamping techniques that I enjoy doing, heat embossing and ink distressing.  I started by inking up the snow background stamp from the Snow Cool set using VersaMark ink.  VersaMark ink is a watermark and embossing ink.  I applied clear embossing powder over the stamped image, and then heat embossed the card using a heat gun.  Using the Blue Jay ink from Lawn Fawn and a blending tool, I applied ink to the front of the card.  I started at the top of the card, working my way down to the bottom, to create a gradient look.  I stamped the sentiment in the same blue jay ink, and added the little snow flakes too.  The penguins were stamped, diecut and colored, then adhered to the card using foam adhesive to give the card some depth.  To embellish twine and sequins were added. This stamp and die set is called Snow Cool...

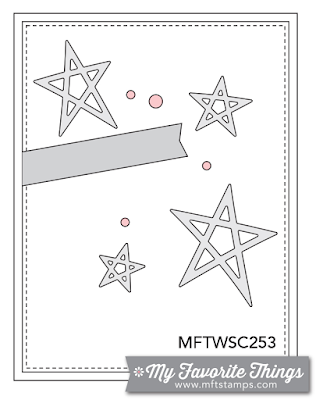
MFT Card Challenge Sketch 253

Image
Hello! This month I get to guest design and play with the Card Challenge Team designers.  How fun!!  What I love about sketches is that they are a starting point to get your creative juices flowing, so to speak.  You can follow a sketch down to a "t" or be more liberal, it really is up to you.  Head on over to the Card Challenges blog to see what the other designers created using this sketch! This week is sketch number 253. Here is what I did using this sketch. Here is a simple supply list: 3D Creative Sheets Dodz Crafty Foam tape Clear embossing powder  (to emboss black ink & gold stars) Delicata Gold Ink Pad MFT Sweet Tooth Card Stock MFT Die-namics LLD Lucky Stars MFT Stamps Hand Lettered Holiday other: gold glitter black pigment ink kraft cardstock twine

Lawn Fawn: Science of Love

Image
This week Lawn Fawn is having their Valentine's release, with 2 new stamp sets and 5 die sets.  Today, we are showcasing the stamp/die set called Science of Love.  This set fuels my inner geek, there are so many cute images I couldn't decide what to use for today's project. I stamped the book in black ink, and then die cut it out.  I colored it in with Copic markers.  The sentiment and hearts were all stamped, and then heat set with clear embossing powder.   Head on over to the Lawn Fawn blog for more projects using this set, and for a chance to win it!! materials used: Lawn Fawn Science of Love stamp set Lawn Fawn Science of Love die set Copic Markers Scrapbook Adhesives by 3L 3D foam squares Scrapbook Adhesives by 3L EZ runner versamark versafine onyz black clear embossing powder