Posts

Showing posts from March, 2020

Happy Birthday

Image
Hello friends! How are you all doing? The state of the world is definitely strange right now. This is a wonderful time to take a little time for yourself and be creative. For myself, papercrafting has always been therapy and I will continue to carve out a little bit of time each day to my craft room to escape.  For this card I first blended a white die cut panel using red, orange, yellow, green and blue inks. Then using Offset Saying, Birthday, I stamped the sentiments using the same inks.  The main sentiment and music notes were stamped onto the panel in black ink. The critters were stamped in black ink, colored in with copic markers, cut out with scissors and then adhered to the panel using foam adhesive onto a Kraft card base.  Just looking at this card makes me happy, and I cannot wait to put it in the mail.  I hope you are still following along with the Lawn Fawn March inspiration week, and check out all of the beautiful projects on the blog!

Happy Easter

Image
This scalloped treat bag is one of my favorite stand alone dies from Lawn Fawn. It is the perfect die to pair with patterned paper. Today, I am sharing this bag created out of the Dandy Day patterned paper with some of the Say What Spring Critters. The critters were stamped in black ink, colored in with copic markers then cut out and adhered to the bag.  Twine was added to the top for an embellishment.  Cute little Easter bags are a great way to package small treats.

Super Star

Image
March Inspiration week continues over at the Lawn Fawn blog! Today the stamp set called Super Star is being showcased. It has these cute mice, great sentiments and images to create out of this world projects.  I created a night sky by blending a few different colors of Distress Oxide inks. Once happy with the blending results, I flicked some water onto the ink to activate it. Then also flicked gold sparkly watercolor ink over it as well. This is how the sky looks starry. The mouse and telescope were stamped in black ink onto white, then colored in with copic markers. The images were cut out using scissors and then adhered onto the card using foam adhesive.  I am also sharing a layout where I used the same stamp set. Using stamps on layouts is a way to stretch your supplies. 

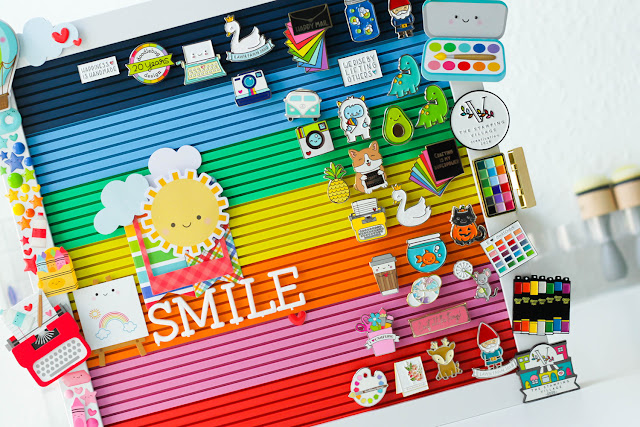
Enamel Pin Board Display

Image
I have a bright and happy letter board that I turned into a way to display my enamel pins over on the Scrapbook & Cards Today Magazine blog .  All of the close ups and details are over there! There is even a bonus project with some tags I created as well!

Welcome Little One

Image
Hello friends! I am in the process of figuring out where the last few months of blog posts went. But for now I have a  card welcoming a little one. This stamp set is called Swan Soiree from Lawn Fawn .  To get the clouds look like a gradient. I masked off the edges of the white cardstock. Then ink blended the panel using very light blue inks. The bottom has more of a blue green hue. Using the Cloud stencil from Lawn Fawn, rotating it in a different direction and applying a darker blue hue. I like to use the ink blending brushes from Taylored Expressions, but you can use your favorite to achieve the same look.  The swan and duck were stamped in black ink onto white cardstock and colored in with copic markers, and then set aside.  The sentiment was stamped in black ink, the pond was stamped in a turquoise ink, and the plants were stamped in green ink.  To finish the card, twine was tied around the front panel then adhered to the card front using foam adhesive, and t