Posts

Showing posts from November, 2010

Lawn Fawn Fly Free

Image
Sorry this is late, blogger was giving me major problems, so it is going to be short and sweet before it changes its mind :) Today I get to show you a cute mini set called Fly Free. I paired the Fly Free set with Bannerific & some pretty Webster's Pages paper. Make sure to go to the Lawn Fawn blog for a chance to win this set. Also the Design Team, has some cool projects you don't want to miss. Lea Lawson   Lynnette Kauffman   Mariana Grigsby   Teri Anderson   Tiffany Johnson **PS** Will add details later when blogger will cooperate

Lawn Fawn: My Silly Valentine sneak

Image
Today the designers for Lawn Fawn are showing sneaks of the upcoming stamp set called, My Silly Valentine. This set is going to make you smile! Just looking at it makes me smile, it is a happy stamp set, but I think all Lawn Fawn stamp sets are happy. A clean & balanced card for you today. A perfectly balanced card is always what I strive to make, whether it is graphic & clean or maybe a little layered card, balance will always make it shine (in my opinion). Some nice textured card stock, pretty pattern paper, twine, foam tape, a border punch and some markers. Visit the Lawn Fawn blog as well as the design team for more awesome projects! Latisha Yoast   Lea Lawson   Lynnette Kauffman   Mariana Grigsby   Teri Anderson   Tiffany Johnson

Lawn Fawn Trimmings

Image
Today Lawn Fawn is adding some fun additions to the store.   A few ribbon sets called, Chipper & Dapper. Today I am using two of the ribbon trimmings from the Chipper set, that I paired with the Frosties stamp set. Have you all started on your Christmas cards? I only have around 10 done. But, I am sure somehow, I will get them all finished. The inspiration for this card came from the Dean Martin song called "Let it Snow" . (click on the link to listen to this song...do it, it will make you happy!) I started my card, with a kraft card base. Next, I layered some of The Girls Paperie Tinsel & Twig pattern paper. Snowfall, to be exact. This paper screams Happy Holidays to me. If you are still looking for some trendy, and very beautiful Christmas pattern paper.  Tinsel and Twig is one of my favorites right now.  I bought mine at my local scrap book store, however, I am sure Two Peas or Scrapbook.com sell it. Once my pattern paper was adhered, I stamped my "let it...

A cute little paper box

Image
Are you all ready for Thanksgiving?   I have all my shopping done, I just need to start prepping some of the dishes I am making. My children are home this week, so trying to keep a clean house, has been fun lol. Today, I am sharing a cute little gift box I made using some October Afternoon paper I had.  I actually cut my pattern paper with a Spellbinders Grand Square die , before I scored the paper.  This ensured that I had perfect measurements for the top and bottom of the box.   Once my box was put together, I wrapped ribbon around it & tied a pretty bow.  The tag was created by using the Bows & Holly stamp set from Lawn Fawn.  After I stamped and fussy cut it out, I punched a hole at the top and attached it to the center of a bow using bakers twine and a button. Making these boxes are quite easy, and really only take a few minutes to make. Materials Used: Spellbinders LF-126 Grand Squares October Afternoon pattern paper Lawn Fawn stamps PTI r...

Spellbinders Holiday Hoppin Day 1: My December Daily album

Image
Welcome to the first day of the  Spellbinders™ Paper Arts   Holiday Hoppin’  Blog Hop!  Spellbinders, along with Spellbinders are showcasing their newest products just in time for your Holiday crafting and gift giving.  Lots of creative ideas are in store, as well as prizes galore!  Each participating company has generously donated towards the prize package listed on the  Spellbinders Blog .  A total of two identical prize packages, one for each day, November 18 and 19 will be given away!  To enter, just leave a comment on a participating blog!  Comments in the first 48 hours of the post are eligible.  One commenter each day will be randomly selected as the winner.  Winners will be announced on November 22, on the  Spellbinders Blog ! Be sure to see all of tomorrow’s  Holiday Hoppin’  blogs for inspiring projects and another chance to win! Visit all of today’s Holiday Hoppin’ blogs: Latisha Yoast  ...

Shaped Christmas Card using Spellbinder die templates & Ginak stamps

Image
November 10th, really? Is anyone else a little freaked out that there are only 44 days until Christmas?  I am, for sure!  I have a head start on my shopping for my children, well for my son.  Shopping for a 14 year old daughter, is a little hard not to mention expensive.  With my husbands upcoming deployment, we will have family visiting for 2 weeks in December, which means I need to be really organized and squared away.  I really like to enjoy the holidays, so I am trying to get some Christmas/Holiday cards done a little early. I love to make shaped cards, and using my Spellbinders die templates make it so easy.  For the base of this card I took out my Grand Labels One dies .  I cut/embossed some card stock, then scored it down the center to create the base of the card (around 3 x 6 inches).  I did the same using some pretty pattern paper.  I stamped the smallest ornament from the GinaK Heirloom Ornament stamp set , using some Brilliance in...

Lawn Fawn Jessie's ABC's sneak

Image
Today the Lawn Fawn design team are sneaking projects using an alphabet stamp set called, Jessie's ABC's. For my project, I decided to make a place card, for a party. I also incorporated the party hat from the Hats off to you stamp set.  Both will be available November 4th.   Head on over to the Lawn Fawn blog , and leave a comment to win this stamp set. Also, take a little blog hop to see what all of the designers created with this set. Danni Reid Lea Lawson Lynnette Kauffman Mariana Grigsby Teri Anderson Tiffany Johnson To create the place I card, I used the Spellbinders Lacey Circles largest die, cut/embossed it, then scored it in half.  Then layered it with another embossed Lacey Circle die cut, from pattern paper.  The party hats were colored in with Copic markers & paper pieced onto the place tag. Materials Used: Lawn Fawn Stamps: Jessie's ABC's & Hats off to you MME pattern paper American Crafts this to that foam tape Copic markers Spellbin...

Lawn Fawn sneak: Hats off to you

Image
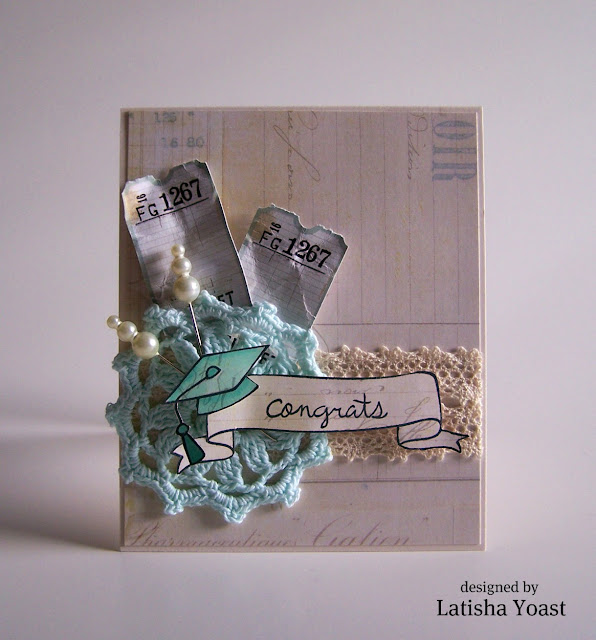
Today, I get to sneak a new set called Hats Off to You, from Lawn Fawn. This is the perfect coordinating set to add fun hats to the Lawn Fawn Critters, or to use on its own like I did today.  I used the graduation cap from this set, along with Bannerific & Sophie's Sentiments .  So wonderful that I can mix and match the sets, and my card still looks cohesive.   The card I created, was inspired by what I would give my daughter on her graduation.  Something really feminine & delicate just like her.  Can I brag for a minute?  My daughter is rocking her first year in High School!  She has a tough honors load, is on the school news paper, in the Christian Athletes Fellowship club, just finishing up with Cross Country & just found out yesterday she made the JV Soccer team!  Did I mention her GPA is a 4.5?!?!  I am so, so proud of her!  Even though, her graduation is years away, I would want to give her a beautiful card like this. ...

Lawn Fawn Critters in the Snow sneak

Image
Today I get to sneak a brand new set from Lawn Fawn called Critters in the Snow. It has the most adorable winter critters you have ever seen! Perfect for making cute, cute, cute winter cards!! You are going to want to stop at the Lawn Fawn blog , for your chance to win this stamp set.  Also, take time to visit the rest of the designers, they have some fun projects to share with you. Danni Reid   Lea Lawson Lynnette Kauffman Mariana Grigsby Teri Anderson Tiffany Johnson To create the glittered stripes, I adhered 5 strips of scor-tape to my card. I then removed 3 of the strips, which then exposed the sticky tape.  I poured fine red glitter over the area, tapping off the excess, then repeated using a snowy white fine glitter. Directions: 1.  Cut/score kraft card stock. 2.  Trim a smaller piece. 3.  Stamp snowflakes in a white ink, ink the edges of the card stock piece. 4.  Place scor-tape down, & create a red/white glittered pattern. 5.  S...