Posts

Showing posts with the label papertrey ink

All you need is LoVe

Image
Happy Friday! I am so excited for a 3 day weekend. I have a dual baby shower to go to tomorrow, but I plan on vegging out all weekend. Can you say, "mommy is sleeping in?" lol Last night, I decided to sit down and play with my August Kit of the Month from Unity Stamp Co.  I used a few other stamps from other companies too (but the focal images are unity).  Where I originally started with card, and where I ended up are totally different, but I love the results.  The text background, is from a little stamp from Prima, and the library card looking stamp is from Papertrey Ink. I stamped the library card stamp, distressed the edges with some Tim Holtz distressed ink & blending tool and then stamped the different images and sentiments in pink from Unity.  Before I adhered the library card to the card base, I added some Prima pattern paper, and wrapped some ribbon around the ivory panel.  I strung the buttons with some Jillibean Soup bakers twine, and adhered them ...

Birthday Wishes

Image
One of my friends {since we were 14} is having a birthday this week, so I needed  a nice but quick card to send her.  It made it even easier because I used Julee T's mojo57 sketch (you can find her blog on my blog roll to the right)  I made my own dp, using a flourish from Inkadinkado & some Colorbox ink.  I also inked up my PTI anniversary set for the sentiment along with a borders and corners set for the dotted square.  This is my favorite kind of card to make, simple but pretty and you can't go wrong with kraft, red & white, its impossible.  Go try and see, it will be beautiful :) "Birthday Wishes" kraft, poppy & stampers select white paper, inkadinkado stamps, PTI stamps, PTI ribbon, rectangle nestie

Unity Challenge Wednesday

Image
So the challenge this week was given by, myself & my challenge is to make a square card and to have scallops on it.  I also provided a sketch if anyone wanted to use that (scroll down).  So here is my card  I used some WeRMemory keepers designer paper and tag, along with my Unity August kit of the month stamps.  I colored the images in with Copic markers. Do you want an awesome stamp!?!  Make sure to play along, I am giving away the "So & So loves" single away, that you can check out here  if you upload on SCS use the key words UNITY, USC3 Here is my sketch if you want to play alon g I had to share this, my daughter is an avid book reader!  So I made her this bookmark, isn't it cute!  I used the Inksesentials Memory Frames and Glass to make it. Tomorrow is HIP HOP Thursday so be sure to go to the Unity forum on Splitcoaststamper.com Unity gives a ton, I mean a ton of free stuff away, not to mention awesome deals & steals >"

Lots of Layers

Image
I am really loving the Noteworthy line of paper from Making Memories, I was planning on saving it for some of my scrap book layouts, because its so pretty but I  couldn't hold out anymore.  Plus to be completely honest, I am behind, way behind in my albums.   So anyhow, here is my card I used Julee's sketch for this.  There is 10 layers on this baby!  I don't think I have used this many layers before, but its really yummy in person.  This is definitely  a two or three stamp card >" "Just because" vintage cream & spring moss card stock from PaperTrey Ink, Notewothy designer paper from Making Memories, Verve Stamps, PTI spring moss twill, Tim Holtz black soot ink, dimmensionals

a scrappy shabby card

Image
Do you ever make something, and you just feel so proud because its awesome lol, snort >" I first picked out the paper I wanted to use, so I grabbed some of this Noteworthy paper from MM, I love the shabby look of it.  The card base is vintage cream from PaperTrey Ink.  The stamping is pretty simple, the panel that has "Mr. & Mrs. Forever Love etc..." are images in, I *think* is Sweet Love from PTI and the main focal sentiment is in the stamp set Anniversary Birds from Verve.  To add to the shabby feeling of this card I added a few buttons and tied twine thru them, I add a glue dot to the bottom of the button, to make it stick to the paper, I don't sew it onto the paper.  Lastly the ribbon is very vanilla 5/8 in grosgrain ribbon by SU.  Oh to get your ribbon to run all the way around the card, I get an exacto knife and make a slit in the fold, thick enough for my ribbon to get through it.

Quick post >"<

Image
I found a little bit of time today to make these cards.  Jess came home and I took a nap, I needed it.  I am still really tired, but that is life when you have a sick child. Both of these cards are cards for the Dare to get dirty challenges going on over at SCS.  This first one is a sketch challenge from Holly, I switched the oval for a circle, it just worked better for me, I combined this sketch challenge with Joan's challenge to use a silhouette.  So I used Flourishes Spring Ephemerals set {which is all silhouettes} All of the card stock, ribbon and ink is from Papertrey ink. For this card I combined two challenges again.  RoseAnn's challenge to make a flap card & Taylor's challenge to use a cupcake on the card.  Flap cards are fun and really easy to make, so I pulled out some leftover materials from my last class, that was already cut and scored {SCORE!} so all I did was stamp the cupcake in the middle, masked it and then stamped the two behind it.  Colored in the im...

Papertrey Ink June Blog Hop >"<

Image
This month is to make something using acetate, I chose to use vinyl because it is much thicker and its glossy on both sides.  When making a card with acetate/vinyl I always cut two of everything, why? because you do not want your tape marks to show.  So no matter what way you look at the card, it looks polished.  I tried to upload more pictures to show how I made the card step by step, but I am having blogger problems, so I will have to write a lot instead of show you. Here you can see a side profile of the card.  I did a gate-fold card.  I have to be really creative when using vinyl because everything kind of need to be hidden.  So on the inside I have a circle and then layered on top of the lavender moon circle, I got some aqua mist paper, scored it and then laid a smaller circle nestabilitie a little over the score line, so I have a little circle card.  Inside this little circle card is where I will put my hand written note/message. Here in this view you can see what I am talking ab...

New Rubber Stamps >"<

Image
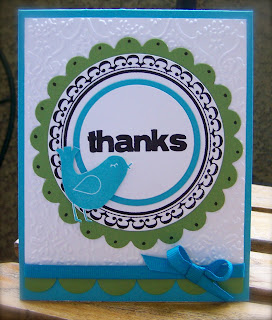
So yesterday I got a box of new Unity Stamps, so I played a lot today!  The first two cards, I took inspiration from today's color challenge, it was Wild Wasabi, Taken with Teal and Whisper white.  I would have never put these colors together, but they turned out nice. For this one I used the textile embossing folder on the whisper white cs.  The wild wasabi paper, I cut with a circle nestability along with all of the other circles.  All of the stamps are from Unity Stamp Co.  Oh on the bottom, I took out my dusty small creative memories circle punch and punched out a bunch of circles, and then ran them along the bottom of the white paper to create a scalloped border.   For this card, same colors again.  All of my stuff was out so why not make another card.    The frogs are from Pond Life {Papertrey Ink} and the rest of the images are from Unity Stamp Co.   SnowChristy on SCS does a sketch every week, so I played along and came up with this.  We went to the San Diego's Zoo Wild...

getting knotty and vinyl coffee

Image
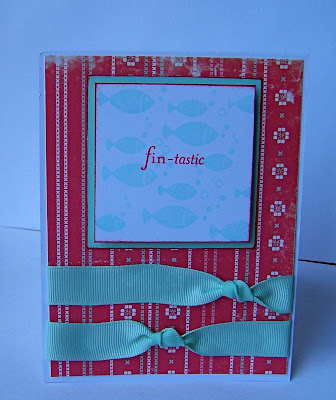
Todays Limited Supplies challenge WSC172, is about using knots on your cards.  Hello so me, so easy peasy.  Since all of my Cosmo Cricket Honey Pie paper is still out, I just kind of made a card similar to the one I made yesterday.  I used Aqua Mist paper and ribbon, because it matches the CC paper perfectly.  The stamp set is from PTI's Pond Life. The next card I used Flourishes new line of stamps called Stamp Simply and this set is called Coffee with Friends.  I love it...I am a coffee lover, so I am happy to have this set.  I used vinyl for the card base.  It is thicker than acetate so it stands up very nicely.  I paper pieced the coffee cups using BasicGrey's Infuse line of 6x6 paper.  The ribbon is from May Arts.  I hope everyone has a great Friday!

Fun card and featured stamper

Image
Yesterday's Featured Stamper on SCS was YLM{cindy}, I changed everything on the card but recreated it by using the same sketch.  I have yet to use my Summer Sunrise paper, ribbon & ink, so they got some love.  The background stamp is Damask from Flourishes, I stamped it in white stazon ink.  I don't have a huge block for it, so I ink the stamp up really good, lay my paper on top, put a scratch piece of paper over it, and then use a brayer and my fingers to get the ink on the paper.  It works really good.   I bought a Martha Stewart border punch & I have been wanting to use it.  I love the effects it gives, but it will not punch through heavy cardstock, it barely wanted to go through the black Basic Grey designer paper.  I wasn't sure about the black paper at first, but I love it now, it really makes the card pop.  The sentiment and the frog images are from Papertrey inks, Pond Life set.  There was too much yellow/orange going on, so I stamped another frog in Garden ...

PTI Swaps and Blog Candy

Image
Here is one of my cards that I did for the PapertreyInk swap I am in.  The stamps set I used were Out on a limb and Spiral Bouquet.  I bought a small package of PTI kraft paper, but I think I still like Stampin Ups better.  I just love the sentiment "Dreams are wishes your heart makes"  it reminds me of the music you hear walking into Walt Disney World, is that song from Cinderella?  Do any of you know? Anyhow thats it for today.  Its cold and overcast outside today, kind of a yucky day. Hope its better in your neck of the woods. Don't forget to scroll down, I am giving a stamp set and some ribbon away. **All materials used to make this card are from Papertrey Ink, the ribbon and paper are Berry Sorbet, Stampers Select white card stock, Kraft card stock, Black ink & Berry Sorbet ink.**

PapertreyInk May Blog Hop

Image
Here is my card that I did for the May PapertreyInk's Blog hop.  You needed to use score lines somewhere on your card.  I really wanted to do "inchies" on the card so that is how I started.  I ended up using the dragonfly from Pond Life, I stamped them with Spring Moss ink.  The designer paper is by Cosmo Cricket and the inchies are layered on the dp, popped up with dimmensionals.  The yellow 5/8in grosgrain ribbon, helps bring the colors out on the dp and it the perfect embellishment for this card.  I scored two vertical lines down the Kraft paper, and then scored again horizontally on the top & bottom of the card to give it a finished look {& I needed to use score lines} These seemed like the visually best places to score.  This was a really simple card to make. Thanks for visiting...I off to blog hop >"

Dragonfly flight

Image
I did the inspiration challenge over on SCS {IC129).  I knew I wanted to use my new Unity Stamps I just got in the mail, so I chose the dragonfly.  These are really big stamps, so if you order them...they seriously are big.  I was fiddling with the sketch a lot before I produced this.  It just looked so much better as a one layer card.  To give it dimmesion and texture, I used the cat tails and grass from PapertreyInk's Pond Life stamp set, the sentiment is from the same set. I really cannot do a card with out ribbon I don't think, so since this is going to a man, I used the hemp twine, which made me feel better >" The card is going to one of our friends who just finished flight school, so the sentiment is really perfect in this case.  I hope you all had a wonderful weekend! Materials used: River Rock card stock, hemp twine, copic pens, tim holtz black soot ink, spring moss ink, chocolate chip ink, Unity Stamps, Papertrey Ink stamps

Just because birthday card

Image
I needed to make a nice card for one of my Aunt's, her birthday is this weekend.  She is has more of a classic, timeless style so I don't do cutesy for her.  So I grabbed my new stamp set from Flourishes, called Lilac.  It has really pretty lilacs in it, but I chose to use the magnolia's that are also in the set.  This is actually 3 different stamps so its easy to create your own magnolia branch.  Magnolia's are typically white with grey and pink accents, so I stamped everything on kraft paper, and then colored in the stamp with a white inkssentials pen.  Once the ink dried I went over the white with grey and pink copics, and used a green copic for the leaves.  Because I stamped it on kraft paper the green ink absorbed differently so I had to go back in with a green & brown prisma colored pencil to add in highlights on the leaves.  The sentiment is on a scalloped oval circle cut out and embossed with a nestability, popped up with a dimmensional.  The ribbon is Purel...

Mother's Day

Image
To all of you Mothers, I hope you all have a wonderful weekend and a great Mother's Day! I had to make them simple because I had a few to send out this year, and well, simple is easier when you are making more than one. Plus I colored in the topiaries, and that took a while. The cardstock & ribbon are showing up way brighter in the picture, but its berry sorbet from Papertrey Ink. The sentiment and the image are both from the Siberian Iris stamp set from Flourishes I bought the set just for these topiaries. You can barely see it but there is kraft cardstock behind the stampers select white cardstock. The polka dotted satin ribbon is from PTI and the black ribbon is from May Arts. Do you ever try to out-do yourself? Don't get me wrong I love making a "WOW" factor card, but I really love simple cards. Not to mention you can close an envelope without taping it and adding extra postage. Totally off topic but can you believe they are raising the postage rates again!!...

Mojo 34

Image
Here is my card for Mojo Monday. I know its Sunday and I just got it done. Where does time go? I need some more of it. Its so much fun playing with Julee's sketches. I woke up early today, so it was really quiet and peaceful . For those beginning stampers out there, to make the flowers appear they are coming out of the flower/watering pot. First you stamp an image on desired cardstock. Then you stamp it again on a post-it note, eclipse tape, or paper and then cut it out. Once the image is cut out you now have a mask. So I put a mask on my flower/watering pot, and started stamping my flowers over it. I generation stamped using barely banana and cameo coral. Remove the mask and tadaa, a pretty little flower bouquet. I used a blender pen at the bottom to blend the colors a little more, to give the image some depth. Once the ink was dry, I took my Martha Stewart glue pen and went over the entire image. You need to work fast because the glue doesn't stay tacky for very long. Then I...