Posts

Showing posts with the label miy

Into The Woods Remix

Image
Hello there! Today, I am sharing a few project using the Into The Woods Remix. I have a card, some pillow boxes and tags! It was such a popular paper collection Lawn Fawn had to bring it back! The pillow boxes were created using the pillow box die. You can use the 6x6 or 12x12 paper. This is a brand new tag set that I was itching to create with. Thank you so much for joining me! Please visit the Lawn Fawn blog to see more wonderful projects, chances to win product and details on the release!!
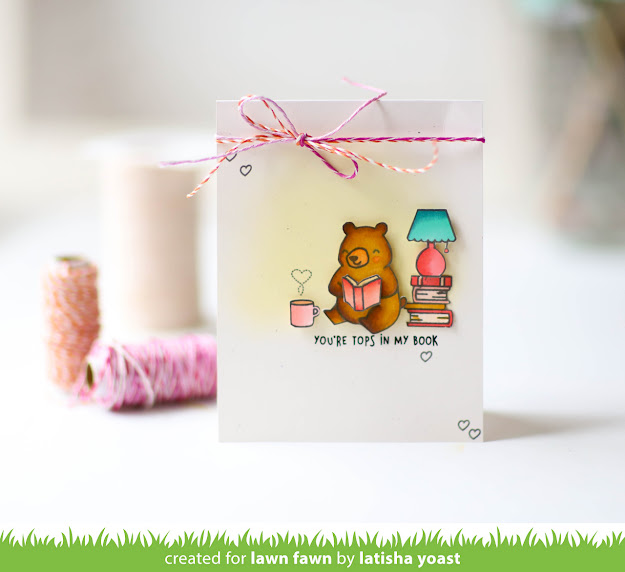
You're Tops In My Book

Image
  Hello friends! I have another new Lawn Fawn card to share with you today! It is from the newest stamp set called Den Sweet Den. It has the cutest little homey stamps that a bear would love. For this card I chose the stack of books, lamp, open book, coffee mug and bear images to create a clean and simple scene. I blended some light yellow ink onto the white card base, stamped the sentiment in black and then added stamped hearts. The images were stamped, colored in with copic markers and then fussy cut out. The images were then adored to the card front with foam adhesive. To embellish a double bow using twine was added. Make sure you are visiting the Lawn Fawn Blog everyday to see the beauful projects shown!

Happy Easter

Image
This scalloped treat bag is one of my favorite stand alone dies from Lawn Fawn. It is the perfect die to pair with patterned paper. Today, I am sharing this bag created out of the Dandy Day patterned paper with some of the Say What Spring Critters. The critters were stamped in black ink, colored in with copic markers then cut out and adhered to the bag.  Twine was added to the top for an embellishment.  Cute little Easter bags are a great way to package small treats.

Slow Down and Enjoy

Image
Hello friends! The April Lawn Fawn Inspiration week is happening, and today I have a cute little project to share.  Have you seen the Slow Down and Enjoy Stamp set & add on dies?  I created a bookmark with them.  I love how the stamp set shows the front and back side of the animals lol. I started by stamping the elephant onto white card stock and coloring it in using copic markers.  Then using a coordinating die, I cut out the book mark.  I like to stamp, color then die cut, so I get perfect placement. Using a low tack tape or washi tape to hold down the die helps immensely.  I then cut out the book mark again using green card stock, adhered them together and tied some LF twine through the holes. Head on over to the Lawn Fawn Blog for some really fantastic projects using these stamps/dies.

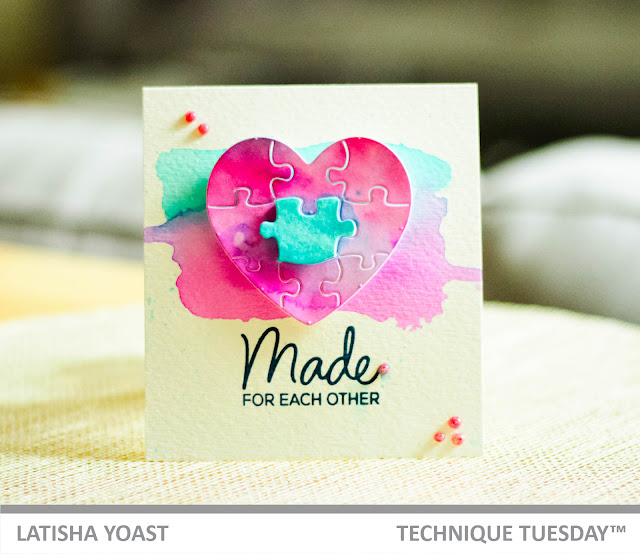
Made for each other

Image
Hello friends!  Another day and another card to share.  To see the full reveal of this stamp set, head on over to the Technique Tuesday blog. I kind of had in my mind how I wanted to use this die and stamp set, thats always fantastic and a sign of a great product.  I started by adding color to watercolor paper, using pink, red, purple and aqua Zig pens.  I did the same to the base of the card, using the same water color paper and pens. Once the watercolor was dry-ish, I stamped the sentiment onto the card bas, then diecut the heart a few times.  I adhered it to the card using foam tape.  Using the remaining diecut, using the center piece of the puzzle (and a different color), I adhered it to the heart using foam adhesive. To embellish, pink sparkly Nuvo drops were used. All of the Technique Tuesday March products are now available, on the new products page.

Life Is Beautiful

Image
Hello friends, today I am sharing a card using the Cherry Blossoms stamp set from Technique Tuesday .  This is Day 1 sneak peak of the March release. For this card, I stamped the cherry blossom main image onto white card stock.  Next, using Zig water color pens and an aqua brush, I water colored the images.  I know these are not typical cherry blossom flower colors, but with spring on the way, I was feeling that they needed a vibrancy.  Once the paper was dry, I cut along the bottom of the image at a diagonal, adhered foam tape onto the back panel and sat it aside.   Next, I trimmed white card stock, stamped the sentiment in black ink, and adhered the panel to aqua card stock.  I then added the colored image panel, adhered it and to finish, I added a few pink Nuvo drops. I am still what I would consider a novice at using the Zig water color pens, but they are extremely user friendly if you are on the fence about getting them.

Happy Fathers Day

Image
Lawn Fawn is having an inspiration week and showcasing some of the newest stamp sets.  Today I am sharing a Fathers Day Card using the new Pland & Simple stamp set.  Being my husband is an aviator, I am loving all of the different creative combinations I can do with these stamps/dies.  Since Fathers Day is tomorrow, I chose the "you're the best" sentiment for the plane banner and the "happy fathers day" sentiment for the card.  I love the combination of blue and greens, so I colored in the banner and plane to coordinate with the pattern paper. For a chance to win this stamp set, head on over to the Lawn Fawn blog , to see all of the beautiful samples using this set.

Bun In The Oven

Image
Hi Friends! Just a clean and simple card today, with a technique.  I used 3 different inks and a mini blending tool, to create the background. The trick is to use the ink lightly and to keep building it up until you like the color.  This does take a little bit of time to create a seamless blend, but its worth it.  I stamped the sentiment in black ink, as well as the images.  I colored the images in with copic markers, cut them out and then adhered them to the card using foam adhesive.  To embellish, I added some twine in the corner. Head on over to the Lawn Fawn Blog , to look at more great projects as well as a chance to win this stamp set!

I Love You Sew Much

Image
Hello Friends! Welcome to the April Inspiration Week for Lawn Fawn.  The designers are using the Stamp and Die set Sewn With Love today.  Its a set with sewing element images and perfect "pun" sentiments.  Head on over to the Lawn Fawn Blog to check out all of the projects created as well have a chance to win this set. I started by blending Merman ink onto the card front with a mini blending tool, once the ink was blended and dried, I stamped my sentiment.  The images were stamped onto white cardstock, colored in with copic markers and then cut out with coordinating dies.  I adhered the diecuts to the card using Scrapbook Adhesives by 3L 3D Foam squares, and added the twine bow using an adhesive dot.  To ground the card a little bit, I adhered a strip of yellow cardstock, to the bottom of the card.

Bicycle Built For You & Road Borders

Image
Welcome to the March Inspiration Week for Lawn Fawn, today I am sharing a card using a stamp/die set called Bicycle Built For You and the Road Borders die set. I love how easy it was to use both of these sets together seamlessly.  There are so many different images and sentiments that the amount of cards and combinations you can create are endless.  For more great inspiration and a chance to win this set, head on over to the Lawn Fawn Blog

Wonderful Window

Image
Hello friends!  Today I am sharing an interactive card using the Wonderful Window die and Meow You Doin stamp/die set from Lawn Fawn.  The window die, will come in 3 pieces, the flowers, the window and the flower pot that the flowers can easily slide into. What makes this interactive, is that the windows can open (if you choose). I paired the window scene with this adorable cat from the Meow You Doin stamp set.  Many Lawn Fawn customers and fans have long requested a cat set, and now there is one.  There are several cat images and sentiments in this set, to keep all of the cat lovers satisfied! I stamped and colored in the cat image with copic markers, before die cutting out the image with a coordinating die, and adhering it to the card.  To give a little contrast to the flowers, i colored the tips of the tulips with a red copic marker.  I was running out of room to stamp a sentiment, so I thought I would stamp the sentiment onto the flower pot. To g...

Sprinkled With Joy Gift Tag & Bag

Image
Hello friends! I decorated a bag, perfect for storing cookies using the Sprinkled With Joy stamp set and dies from Lawn Fawn.  Its a really cute baking set, focusing on sugar cookies.  I love that there are a few different dies for the stove, including one where the oven opens (as shown).  The cute factor and genius behind this set is ridiculous. Some times there just is not room to add a sentiment on a tag, thats why i love to stamp on bags as well.  Its an extension of the tag and just completes the project nicely. There are a ton of projects using this set over on the Lawn Fawn Blo g, they are also giving away this stamp and die set!  Head on over and leave a comment, and leave a little inspired!

Lawn Fawn: Thanks a Bushel

Image
Hello friends! As children all over the US head back to school, I decided to make a fun teachers gift.  Using the new stamp set and dies called Thanks a Bushel from Lawn Fawn, I made this plain muslin bag into something cute. I'm not sure where I bought these plain muslin bags, but if I had to guess, probably a $1 section at a store.  With black ink, I stamped the apples and basket of apples onto the bottom of the bag.  I made sure that each time I stamped that there was plenty of ink on the stamp and that I applied firm even pressure.  I then colored in the images with copic markers.  Since these markers bleed, I had to lightly color near the edges.  I stamped the hearts in a red ink.  I die cut the tag from red felt and die cut a circle using burlap.  Using the same circle die, I die cut a white circle, trimmed it down and stamped a sentiment. For more great project using this set, as well as a chance to win some fabulous product,...

Lawn Fawn: Perfectly Fall Plaid

Image
Hello friends!  Today I am sharing another treat bag, using the Scalloped Treat bag die and Stitched tree border dies from Lawn Fawn.  If you head on over to the Lawn Fawn blog , the focus today is the Perfectly Plaid Fall pattern paper, as well as new card stock and ink (like storm cloud...its a dark grey). Yesterday I talked about how easy is it is to create this treat bag.  Today I die cut the Stitched trees die and adhered it to the front of the bag using foam adhesive, it just gives the bag that little extra touch.  I didn't add a tag, but adding a stamped sentiment onto the twine would be super cute! Materials Used: Lawn Fawn Scalloped treat bag die Lawn Fawn Stitched Tree border die Lawn Fawn Perfectly Plaid Fall pattern paper Lawn Fawn twine

Lawn Fawn: Scalloped Treat Bag & Bows

Image
Hello friends, I am back today sharing a treat bag.  Lawn Fawn has another die that when die cut twice, creates a scalloped treat bag.  The score lines are created when you die cut it, so all you have to do is fold along the lines, add adhesive and adhere together.  There is a great video that explains how to use the die over on the Lawn Fawn youtube channel, and on the blog.  Head on over to the Lawn Fawn Blog , to see all of the wonderful projects using todays featured products.  The Bow die, is also new this month, there are three different sized bows. I used the Perfectly Plaid Fall 12x12 pattern paper to create this bag, as well as the bow.  Each bag you need to die cut twice, so you can get 4 bag diecuts to make 2 treat bags from a single sheet of 12x12 paper.  The Halloween image and sentiment are from the Plan On It: Holidays stamp set.

Lawn Fawn: Jump For Joy & Leafy Tree Backdrop

Image
Hello there! I have had one busy summer!  I will save that for a later blog post, but today I am sharing a card, using some new product from Lawn Fawn. I used a stamp set call Jump for Joy (and coordinating dies), along with a die background call Leafy Tree Backdrop.  Together I made this fun, scenic card, perfect for fall holidays. Make sure you visit the Lawn Fawn Blog everyday, this next week because there will be lots of prizes given away, as well as, tons of great project ideas!

Lawn Fawn: December Inspiration Week

Image
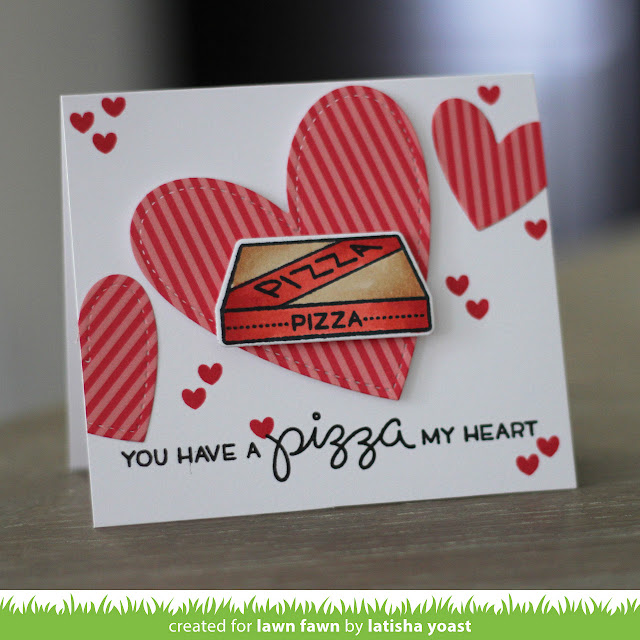
Hello there!  Fun things going on over at the Lawn Fawn Blog, two brand new stamp sets and coordinating dies are being released this week.  As well as some dies that coordinate with past sets.  Today, I am sharing a card I made using a new stamp/die set called Pizza My Heart (so stinking cute), along with new stitched stackable heart dies. For a chance to win these new products, and see more great projects, head on over to the Lawn Fawn Blog . The pizza box was, stamped in black ink, die cut out and then colored in with Copic Markers.  To give the card a little bit of depth I popped up the center heart and pizza box using foam squares.

MFT Card Challenges Sketch #256

Image
Hello there!  A big thank you to Susan, and the amazing designers over at the Card Challenges blog this month.  I love how sketches give you that starting point when you are in need of inspiration.  Today I am sharing a card, based off of sketch #256.  Make sure you head on over to the Card Challenge blog to participate in all of the fun, and maybe win a prize! I did not have feathers, so I used stamps from the MFT Cat-itude Stamp set, to recreate the feathers lined up.  I just used fish & cat stamps instead.  Once I stamped the images I colored them in using copic markers. supplies MFT Cat-itude stamp set Blending Card by X-press it MFT Black Licorice Hybrid Ink Pad Foam Tape other sparkly kraft card stock pink card stock twine copic markers